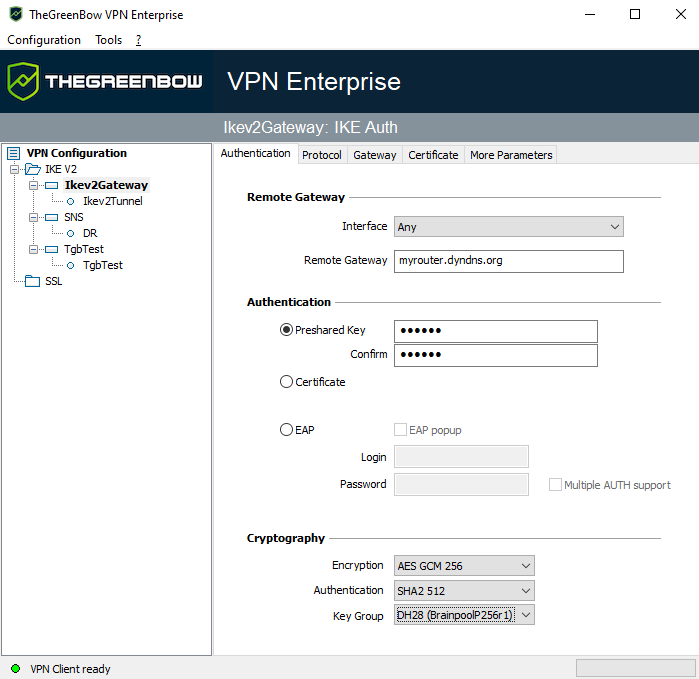
Configuration Panel
The Configuration Panel is the administrator’s interface for SN VPN Client Exclusive.
It is only accessible if the VPN Client has been started as Windows administrator (see paragraph Running the VPN Client as administrator in section Starting the software above), or for any user if the option Restrict access to the Configuration Panel to administrator has been unchecked (not recommended).
It includes the following items:
-
A set of menus for VPN configuration and software management,
-
The VPN configuration tree,
-
VPN tunnel configuration tabs,
-
A status bar.
Menus
The following menus are available in the Configuration Panel:
-
Configuration
-
Save
-
Import: Import a VPN configuration
-
Export: Export a VPN configuration
-
Quit: Close all open VPN tunnels and quit the software
-
-
Tools
-
Console: IKE connection traces window
-
Reset IKE: Restart the IKE service
-
Options: Protection, display, startup, language management, PKI management options
-
?
-
Online support: Access to online support
-
Check for update: Check for available updates
-
Purchase license online: Access the online store
-
Status bar
The status bar at the bottom of the main interface displays multiple items:

-
The “LED” on the left edge is green when all the software’s services are operational (IKE service)
-
The text on the left shows the software status (VPN Client ready, Saving configuration, Applying configuration, etc.).
-
When the trace mode is enabled, the text “Trace Mode is ON” is shown in the middle of the status bar.
-
The
 icon, which appears to the left of this text, is a clickable icon that opens the folder containing the log files generated by the trace mode.
 -
The progress bar on the right side of the status bar shows the progress when saving a configuration.
Shortcuts
| Ctrl+S | Save the VPN configuration |
| Ctrl+Enter | Switch to the Connection Panel |
| Ctrl+D | Opens the VPN Console window |
| Ctrl+Alt+R | Restart the IKE service |
| Ctrl+Alt+T | Enable the trace mode (log generation) |
VPN configuration tree
Usage
The left side of the Configuration Panel is the tree structure of the VPN configuration. The tree can contain an infinite number of tunnels.
Under the root called “VPN Configuration”, there are two levels that allow you to create the following respectively:
-
• IPsec IKEv2 tunnels, specified by an IKE Auth and a Child SA, knowing that each IKE Auth can contain more than one Child SA
-
SSL/TLS tunnels
Clicking on an IKE Auth, Child SA, or TLS will open the corresponding VPN configuration tabs on the right-hand side of the Configuration Panel. See the following sections for further details:
-
IPsec IKEv2 tunnel
-
SSL tunnel (OpenVPN)
An icon is associated with each tunnel (Child SA, or TLS). This icon shows the status of the VPN tunnel:

|
Tunnel is closed |

|
Tunnel is being opened |

|
Tunnel is open |

|
Incident when opening or closing the tunnel |
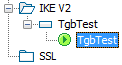
You can edit and change the name of any item in the tree by clicking twice in a row on it, without double-clicking.
If there are any unsaved changes in the VPN configuration, the modified item is shown in bold. As soon as the tree is saved, all text formatting is removed.
NOTE
Two items in the tree cannot have the same name. The software displays a message to the user if the name entered is already in use.
Contextual menus
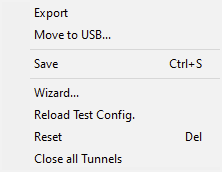
VPN Configuration
Right clicking the VPN configuration (root of the tree) displays the following contextual menu:
| Export | |
| Save | Saves the VPN configuration. |
| Configuration Wizard |
Opens the VPN Configuration Wizard. |
| Reload default configuration | This menu is used to reload the default configuration at any time. |
| Reset | Resets the VPN configuration after confirmation by the user. |
| Close all tunnels | Closes all open tunnels. |
IKEv2, SSL
Right-clicking the IKEv2 or SSL items will display the following contextual menu, which allows you to export, save, create, or paste an IKE Auth/SSL:
|
|
|
|
IKEv2 menu |
SSL menu |
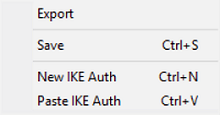
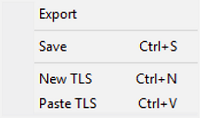
| Export | Exports all IKEv2 tunnels. |
| Save | Saves all IKEv2 tunnels. |
| New IKE Auth
New TLS |
Creates a new IKE Auth/TLS. The parameters of this new IKE Auth/TLS will be filled in with default values. |
| Paste IKE Auth
Paste TLS |
Adds an IKE Auth/TLS that has been previously copied to the clipboard. |
IKE Auth
Right-clicking an IKE Auth displays the following contextual menu:
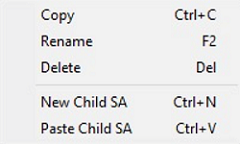
| Copy | Copies the selected IKE Auth to the clipboard. |
| Rename |
Renames the IKE Auth. This menu is disabled as long as one of the tunnels of the relevant IKE Auth is open. |
| Delete |
Deletes the IKE Auth, including any associated Child SAs, after confirmation by the user. This menu is disabled as long as one of the tunnels of the relevant IKE Auth is open. |
| New Child SA | Adds a new Child SA to the selected IKE Auth. |
| Paste Child SA | Adds the Child SA that has been copied to the clipboard to the IKE Auth. |
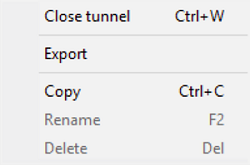
Child SA or TLS
Right-clicking a Child SA or TLS displays the following contextual menu:
|
|
|
|
Menu with tunnel closed |
Menu with tunnel open |
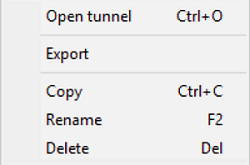
| Open tunnel | Displayed if the VPN tunnel is closed. Opens the selected (Child SA or TLS) tunnel. |
| Close tunnel | Displayed if the VPN tunnel is open. Closes the selected (Child SA or TLS) tunnel. |
| Export |
Exports the selected Child SA/TLS. This function allows users to export the entire tunnel, i.e. both the Child SA and its associated IKE Auth, or TLS, and thus to create a fully operational, single-tunnel VPN configuration (which becomes immediately functional when imported). |
| Copy | Copies the selected Child SA/TLS. |
| Rename |
Renames the selected Child SA/TLS. This menu is disabled while the tunnel is open. |
| Delete |
Deletes the selected Child SA/TLS after confirmation by the user. This menu is disabled while the tunnel is open. |
Shortcuts
The following shortcuts are available for tree management:
| F2 |
Used to edit the name of the selected phase |
| Del |
Deletes a selected phase, following confirmation by the user. If the actual VPN configuration is selected (root of the tree), the software asks whether a full reset of the configuration should be performed. |
|
Ctrl+O |
Opens the corresponding VPN tunnel if a Child SA/TLS is selected. |
|
Ctrl+W |
Closes the corresponding VPN tunnel if a Child SA/TLS is selected. |
|
Ctrl+C |
Copies the selected phase to the clipboard. |
|
Ctrl+V |
Pastes (adds) the phase that has previously been copied to the clipboard. |
|
Ctrl+N |
If the VPN configuration is selected, creates a new IKE Auth. If an IKE Auth is selected, creates a Child SA/TLS. |
|
Ctrl+S |
Saves the VPN configuration. |