Configuration Wizard
The Configuration Wizard is used to configure a VPN tunnel in three easy steps.
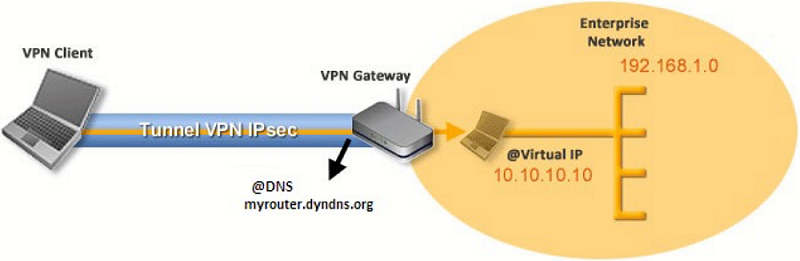
The way the Configuration Wizard works is illustrated in the example below:
-
The tunnel is open between a workstation and a VPN gateway that has been assigned the DNS address “myrouter.dyndns.org”
-
The company’s local network is 192.168.1.0 (it may, for example, include machines that have been assigned the IP addresses 192.168.1.3, 192.168.1.4, etc.)
-
Once the tunnel is open, the remote workstation will have the following IP address on the company’s network: 10.10.10.10
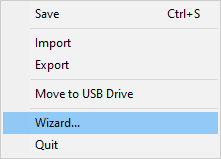
In the main interface, open the VPN Configuration Wizard: Configuration > Wizard….
TIP
We recommend configuring IKEv2 tunnels with a certificate. Refer to chapter Security recommendations.
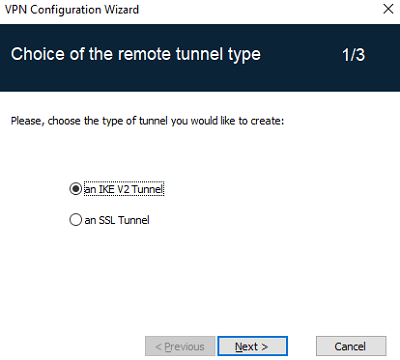
Step 1
Choose the VPN protocol to be used for the tunnel: IKEv2 or SSL.
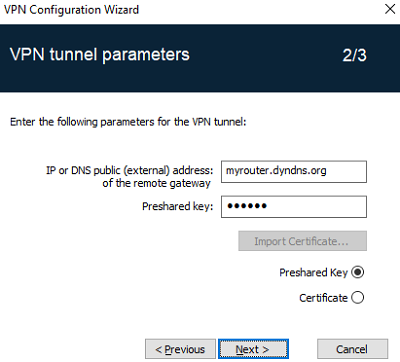
Step 2
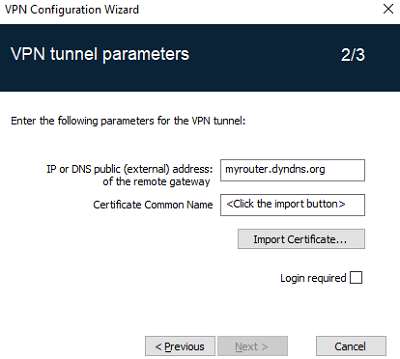
Configuring an IPsec/IKEv2 tunnel
Enter the following values:
-
The IP or DNS address on the internet network side of the VPN gateway (e.g. myrouter.dyndns.org)
-
A preshared key that must be configured identically on the gateway
-
OR: A certificate that must be imported using the Import Certificate… button (see section Importing a certificate to the VPN configuration)
For an SSL tunnel (OpenVPN)
Enter the following values:
-
The IP or DNS address on the internet network side of the VPN gateway (e.g. myrouter.dyndns.org)
-
A certificate that must be imported using the Import Certificate… button (see section Importing a certificate to the VPN configuration)
Step 3
Review the Summary window to check whether the configuration is correct and then click Finish.
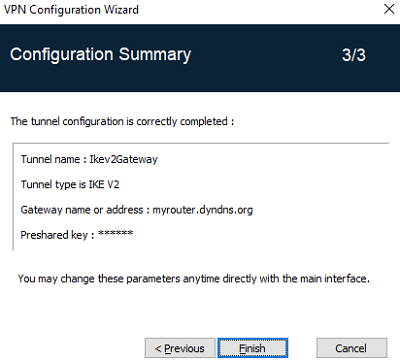
The tunnel that has just been configured now appears in the VPN configuration tree of the main interface.
Double-click the tunnel to open it or use the tabs of the main interface for further configuration.