Configuring a route-based star topology
Depending on which authentication type you choose to secure your topology, there may be operations you must perform before creating the topology.
- For further information on X509 certificate authentication, refer to the section Configuring a policy-based mesh topology.
- For further information on pre-shared key authentication, refer to the section Configuring a policy-based star topology.
Follow the steps below to create a route-based VPN topology:
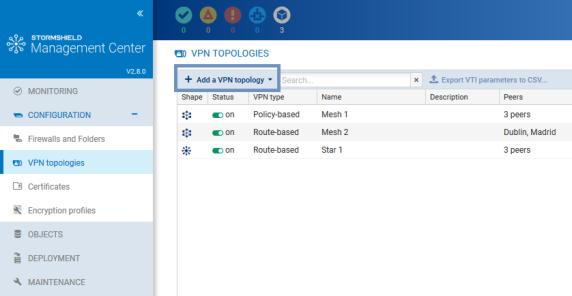
- In Configuration > VPN topologies, click on Add a VPN topology at the top of the screen and select Star.

- In the window that opens, select Route-based VPN and click on Create the topology.
- Enter a name. A description is optional.
- Choose the authentication type in the next step.
- If you have chosen X.509 certificate authentication, you can indicate a post-quantum pre-shared key ID and its password. Such keys provide protection particularly from "store now, decrypt later" attacks. For more information, refer to the SNS User guide. This feature is available only on firewalls in at least version 4.8.0, and only with IKEv2.
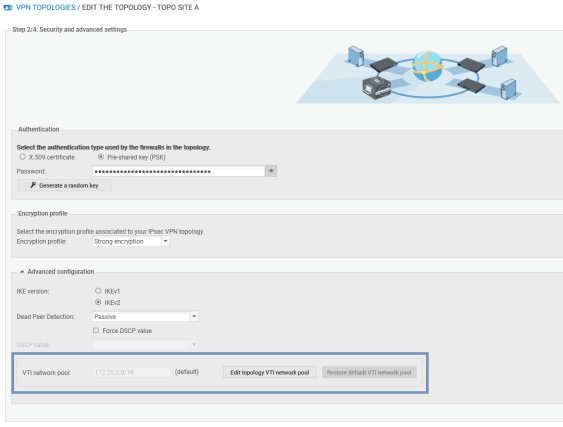
- Select the encryption profile. The SMC server offers pre-configured profiles. Create customized profiles in Configuration > Encryption profiles. Refer to the SNS User guide for more information on encryption profile options.
- If you need to edit the default network pool for IPsec VTIs, expand the Advanced properties section. For more information on the VTI network pool field, refer to the section Editing the VTI network pool.

- Choose the center of your topology. It will then show a star icon in the list of firewalls below, and the firewall will appear in bold.
- If needed, check the option Do not initiate the tunnels (Responder-only) if the IP address of the center of the topology is dynamic. Only the peers will then be able to mount the VPN tunnel. This option is available from the version 3.6.0 of the SNS firewalls.
- Select your topology peers. You can select connected or offline firewalls. You can also select firewalls that have never connected, on the condition that you have set a default custom or dynamic contact address in the System > IPsec VPN tab in the firewall settings.
You need to hold write access privileges on the firewalls that you wish to select as peers. For more information, refer to the section Restricting folder administrators' access privileges. - In the next step, double-click on the line of a firewall to open the Peers and VTI window:
- For further information on the Contact address and Local address settings, refer to the sections Defining the contact IP address of firewalls for VPN topologies and Selecting the output interface of firewalls for VPN topologies.
- IPsec VTIs will automatically be generated after the topology is created. Host VTI objects that represent remote peers will also be automatically generated. They can be used in routes or filter rules to set up routing. You will see them in your object database as "VTI_on_FW1_with_FW2_in_topologyname". These objects are automatically deployed on firewalls. For further information, refer to the section Defining the traffic routing policy.
- Click on Apply to close the window.
- Click on Apply again at the end of step 4/4 to generate the topology.
- If the topology contains firewalls with network configurations that SMC does not manage, SMC will offer to download the IPsec interface .csv configuration file. IPsec interfaces must be created manually on these firewalls. Refer to the section Defining IPsec VTIs on SNS firewalls for further information. For firewalls with network configurations that SMC manages, SMC will automatically create the IPsec interfaces. Refer to Configuring IPsec interfaces (VTI). The .csv file indicates in the "created_by_smc" column whether interfaces were automatically created by SMC.
- Deploy the configuration on the firewalls in the topology. The VPN configuration belongs to the firewall's global policy.
Your topology is still not operational at this stage. Follow the instructions in Defining IPsec VTIs on SNS firewalls if the topology includes firewalls with network configurations that SMC does not manage and Defining the traffic routing policy to complete the process of setting up a route-based VPN topology.