Configuring a policy-based star topology
Example of a scenario:
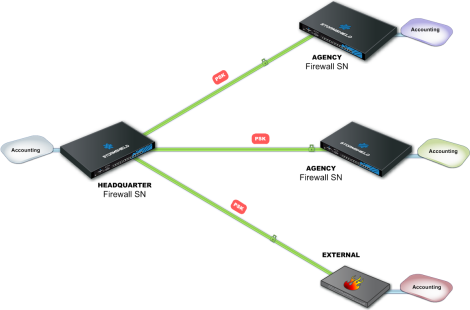
A company with its head office in Paris has two branches in Bordeaux and Madrid. The Accounting sub-network at the head office needs to exchange information with the Accounting sub-networks in the branches. The company's three sites are protected by SNS firewalls managed by the SMC server.
The company has just acquired a new organization that also has an Accounting department and whose network is protected by a firewall from another vendor.
The administrator needs to know the address range of this firewall, which will be declared as an external peer, and the address range of the sub-network.
The chosen authentication method is by pre-shared key (PSK).

To configure VPN tunnels between the four sites, follow the steps below.
- Go to the Objects menu on the left.
- Create as many objects as the number of traffic endpoints or hosts that will be included in your VPN topology, i.e., four Network objects in our example.
- Your topology includes an external peer. Create a Host object for this firewall.
These may be Network, Host or Group objects.
IMPORTANT
It is not possible to use groups containing variable objects in VPN topologies. VPN tunnels configuration would be invalid.
You now have all the necessary elements for configuring your VPN topology.
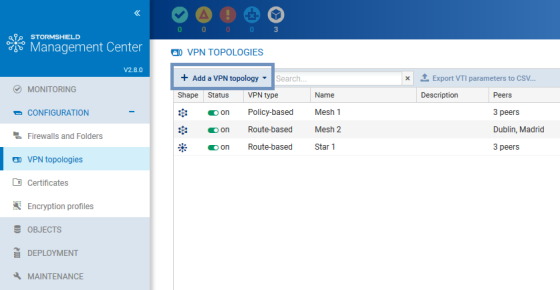
- In Configuration > VPN topologies, click on Add a VPN topology at the top of the screen and select Star.

- In the window that opens, select Policy-based VPN and click on Create the topology.
- Enter a name. A description is optional.
- Select pre-shared key authentication.
- Generate a random key.
- The strongest encryption profile is selected by default. The SMC server offers pre-configured profiles. Create customized profiles in Configuration > Encryption profiles. Refer to the SNS User guide for more information on encryption profile options.
- Choose the center of your topology. It will then show a star icon in the list of firewalls below, and the firewall will appear in bold.
- If needed, check the option Do not initiate the tunnels (Responder-only) if the IP address of the center of the topology is dynamic. Only the peers will then be able to mount the VPN tunnel.
- Select your topology peers. You can select connected or offline firewalls. You can also select firewalls that have never connected, on the condition that you have set a default custom or dynamic contact address in the System > IPsec VPN tab in the firewall settings.
You need to hold write access privileges on the firewalls that you wish to select as peers. For more information, refer to the section Restricting folder administrators' access privileges. - Select the traffic endpoints associated with each of your peers. For further information on the Contact address and Local address settings, refer to the sections Defining the contact IP address of firewalls for VPN topologies and Selecting the output interface of firewalls for VPN topologies.
- Click on Apply.
- Deploy the configuration on the firewalls involved in the topology. The VPN configuration belongs to the firewall's global policy.