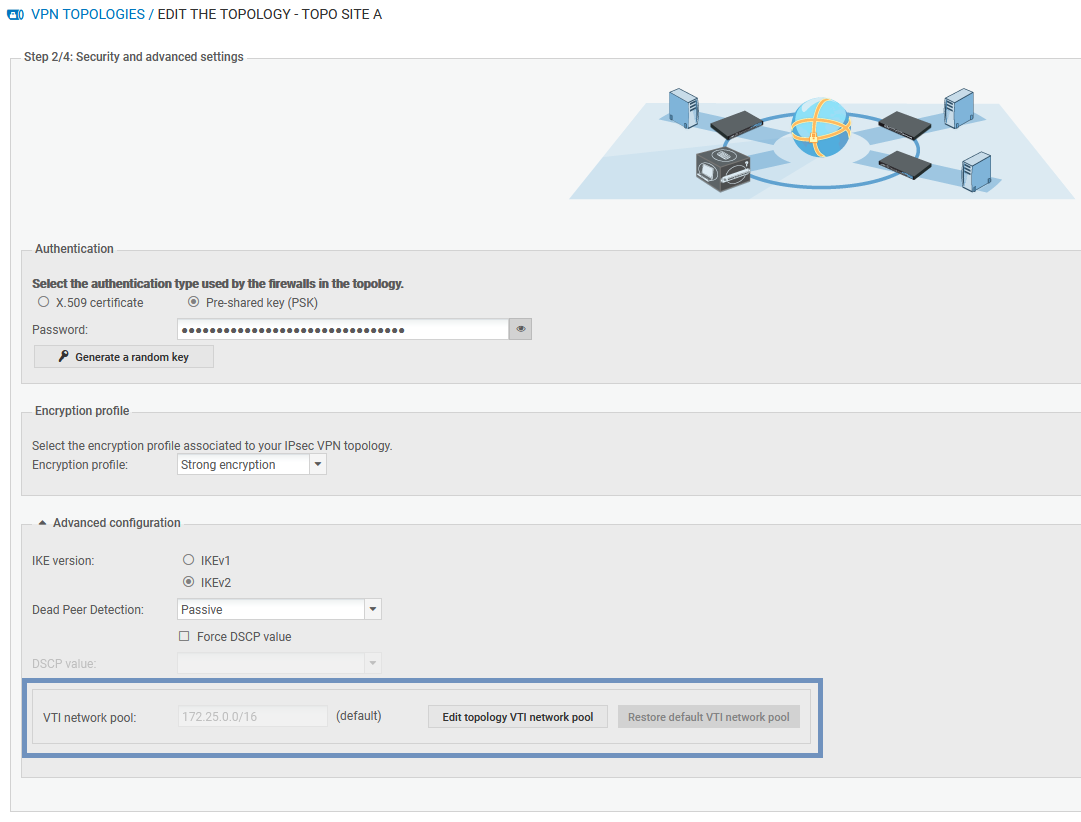
Editing the VTI network pool
WARNING
Folder administrators whose read access privileges are restricted to certain folders on SMC cannot perform this operation. For more information, refer to the section Restricting folder administrators' access privileges.
When a route-based VPN topology is being created, the SMC server selects the IP addresses of IPsec VTIs from a private sub-network defined by default.
This sub-network is a reserve of available addresses and must be included in (or equal to) one of these three sub-networks:
- 10.0.0.0/8
- 172.16.0.0/12
- 192.168.0.0/16
The sub-network suggested by default is 172.25.0.0/16.
This default network pool is the same across all topologies. If necessary, you can edit the global pool, or a pool specific to a topology.
IMPORTANT
If you edit a topology’s network pool of IPsec interfaces after the topology is created and deployed, you should verify the configuration of the interfaces already created on your firewalls, if SMC does not manage the network configuration.
The default network pool is the pool that is used when a new topology is created. To edit it:
- In Configuration > VPN topologies, click on the
 icon on the top right side of the screen and select Edit default VTI network pool.
- Indicate the new default network pool.
This change does not affect existing topologies, which will keep the final pool when they are created.
The network pool can be edited during or after the creation of a new topology.
To edit it for an existing topology:
- In Configuration > VPN topologies, click on the pencil icon
 that appears when you scroll over the VTI network pool column in the grid.
 - Expand the Advanced properties section.

- Click on Edit topology VTI network pool.
- Click on Confirm changes in the warning window. Verify the configuration of interfaces already created on your firewalls.
- Indicate a new private sub-network from the three listed at the beginning of the section.
- Deploy the configuration.