SN160(W), SN210(W) and SN310
| SN160(W) | SN210(W) | SN310 | ||
|
|
|
|
||
|
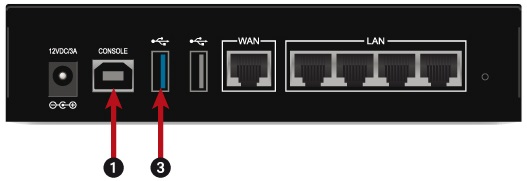
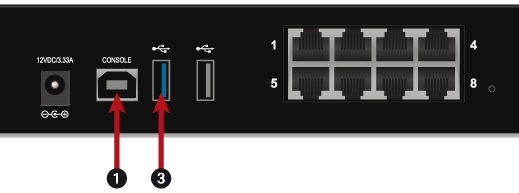
1: USB port for access in console mode 3: USB 3.0 port of USB drive. |
1: USB port for access in console mode 3: USB 3.0 port of USB drive. |
1: USB port for access in console mode 3: USB 3.0 port of USB drive. |
||
As the USB port 1 allows access to the SNS firewall in console mode, users can connect to it from a PC. For this connection to work, a driver must be installed on the PC. Download it at http://www.ftdichip.com/Drivers/VCP.htm.
On the powered off SNS firewall:
- Insert the USB drive into the USB 2.0 or 3.0 port on the SNS firewall.
- Connect the USB 1 port to a USB port on the computer, by using the USB cable provided with the SNS firewall.
- Launch a console emulator on the PC to access the SNS firewall (115,200 baud - 8N1).
- Power up the SNS firewall, which will start up. The console emulator will then display:
SoC: Kirkwood 88F6281_A1DRAM: 512 MiB
WARNING: Caches not enabled
SF: Detected MX25L4005 with page size 64 KiB, total 512 KiB
In: serial
Out: serial
Err: serial
Net: egiga0, egiga1
switch port 4 disabled
88E6172 Initialized
Hit any key to stop autoboot: 3... 2... 1...
- Immediately press any key to interrupt the automatic startup. You have 3 seconds to do so.
- For these firewalls:
- SN150: type run bootusb and confirm,
- SN160(W), SN210(W) and SN310: type run bootusb3 and confirm.
The SNS firewall will start up on the USB drive. Continue to the section Starting the restoration of the SNS firewall.


