Required operations following a BIOS update
Once you have updated the BIOS, launch the operations below, in this order.
Configuring the password to access the UEFI control panel
If you had set a password to access the UEFI control panel before updating the BIOS, this password will be deleted. You will need to set it again, by following the instructions in the technical note Protecting access to the configuration panel of the UEFI on SNS firewalls.
Enabling Secure Boot
The Secure Boot feature is enabled by default on SN-M-Series-720 and SN-M-Series-920 model firewalls as of BIOS version R1.03 in factory settings. You can enable it again by following the instructions in the section Enabling Secure Boot in the SNS firewall’s UEFI in the technical note Managing Secure Boot in SNS firewalls' UEFI corresponding to your SN-M-Series model firewall.
Sealing the TPM
If the TPM had been initialized on the firewall before updating the BIOS, you will need to seal it once again. This is because at the end of the BIOS update, trusted hash values will have changed, preventing the decryption of protected private keys.
To reseal the TPM, follow one of the procedures below.
From the web administration interface
This use case is exclusive to SNS 4.8.7 and higher versions. For earlier SNS versions, you must perform this operation from the CLI console.
-
Log in to the firewall’s web administration interface.
A window will appear automatically. In a high availability configuration, a window also appears if the TPM on the passive firewall needs to be sealed. If both members of the cluster are concerned, two windows will appear one after the other.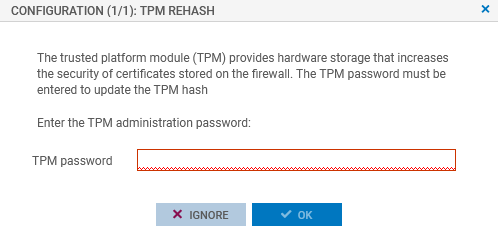
-
Enter the TPM password in the relevant field.
-
Click on OK.
From the CLI console
-
Seal the TPM on the firewall with the command:
SYSTEM TPM PCRSEAL tpmpassword=<password>
Replace <password> with the TPM password.
-
If the firewall is part of a high availability cluster, seal the TPM on the passive firewall with the command:
SYSTEM TPM PCRSEAL tpmpassword=<password> serial=passive