Address book
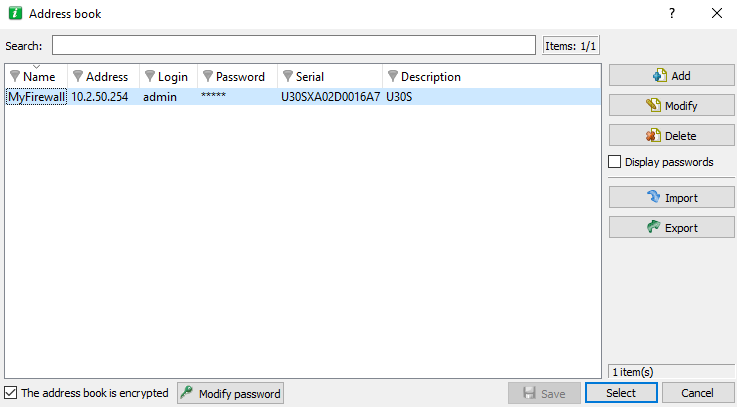
The address book can be accessed from the menu File\Address book.
REMARK
The address book can also be opened automatically upon the startup of the application if you have selected the option in Application settings/Behavior at startup. (cf. Section Behavior at startup).

Figure 3: Address book
It is possible to store connection data on your different firewalls. This information is stored on the same client workstation on which the interface has been installed. It may be encrypted if you check the option Address book is encrypted. In this case, you will be asked to enter an encryption key. The information that is stored for each firewall includes the IP address, login name, connection password and the serial number of the firewall to which you wish to connect. This password belongs to an authorized user.
By specifying a serial number, you will protect yourself from “man-in-the-middle” attacks. If you attempt a connection on a firewall that does not meet the “serial number” criterion indicated in the address book, the monitor will inform you that you are attempting to connect to an unknown firewall. You will also be asked if you wish to add this serial number to the list of authorized firewalls. Verify the information displayed in the monitor before accepting such a request.
Once this information has been entered, you may save it using the Save button. To open a session on one of the firewalls from the address book, click on its name then on the OK button, or simply double click on the name of the firewall.
WARNING
If you modify the Address book is encrypted option, the address book has to be saved once more to apply the changes
Check the option Display passwords to check the passwords used for each Firewall saved in the address book (passwords are displayed in plaintext).
Adding an address
Click on the Add button to add an address to the address book. Other information to supply:
|
Name |
The name of the firewall. |
|
Address |
IP address of the firewall. If the firewall’s web administration port has been modified, indicate the IP address followed by a colon, then the administration port. Example: 192.168.0.1:3333. |
|
User |
The user account. |
|
Password |
User password. |
|
Confirm |
Confirm the password. |
|
Description |
Description or comments regarding the firewall. |
Modifying an address
The procedure for modifying an address in the address book is as follows:
 Select the firewall to be modified.
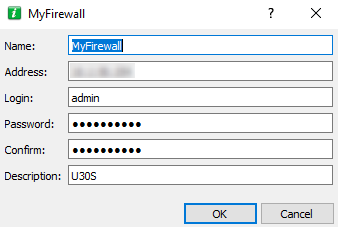
 Click on the Modify button. The following window will appear:

Figure 4: Modifying an address
 Make the necessary changes.
 Click on OK to confirm changes.
Deleting an address
The procedure for deleting a firewall from the address book is as follows:
 Select the firewall to delete.
 Click on the Delete button. The following message will appear:
"Delete this entry?"
 Click on Yes or No to confirm whether to delete or cancel.
Importing an address book
The procedure for importing an existing address book is as follows:
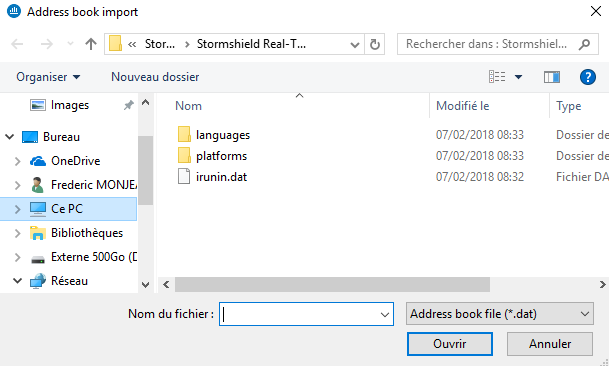
 Click on Import. The following window will appear:

Figure 5: Importing the address book
 Select the file to import.
REMARK
The file to import should be in .dat format.
 Click on Open.
Exporting an address book
The procedure for exporting an existing address book is as follows:
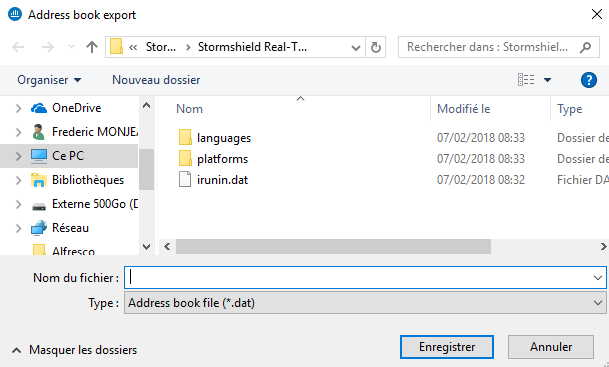
 Click on Export. The following window will appear:

Figure 6: Exporting the address book
 Select the file to export.
REMARK
The file to export should be in .dat format.
 Click on Save.
Search
The search covers all information found in the columns.
Information can be filtered on a column and the search can then be refined.
Examples:
- Filter on the “Address” column containing 129: a list of results will appear; next, launch a global search by refining according to address.
- Filter on the “Address” column beginning with “10.2”, then search from the displayed addresses, hosts with addresses beginning with “10.2.14” by entering only “14” in the search field.