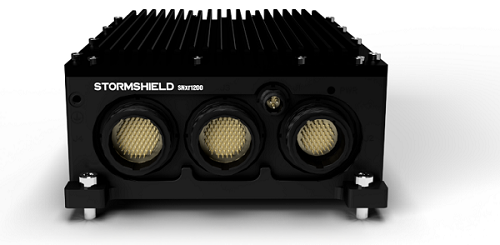
SNxr1200
Dismantling
- Remove the warranty sticker.
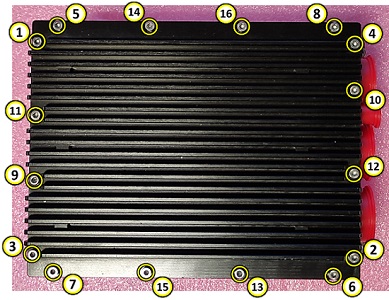
- Using a 2.5mm-wide hex key, unscrew the 16 silver screws that hold the upper cover in place on the SNxr1200.
- Carefully lift the upper cover of the SNxr1200.
- Using a 2mm-wide hex key, unscrew the 4 screws that hold the cards in place.
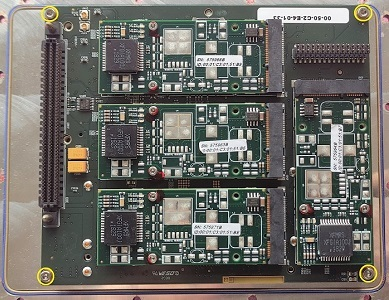
- Carefully remove the cards and turn over the whole drive to locate the M.2 SSD.
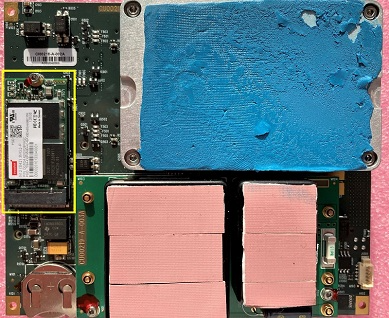
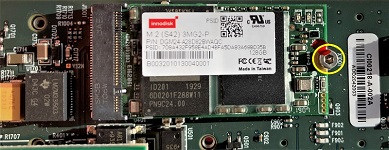
- Using a 1.5mm-wide hex key, remove the screw that holds the M.2 SSD in place.
- Remove the M.2 SSD.
Resetting the TPM
As the TPM (trusted platform module) is welded to the motherboard, the TPM has to be reinitialized in BIOS to work around the fact that the motherboard cannot be removed.
NOTE
A serial link or connection using a monitor and keyboard is required to access BIOS.
- Power up the firewall.
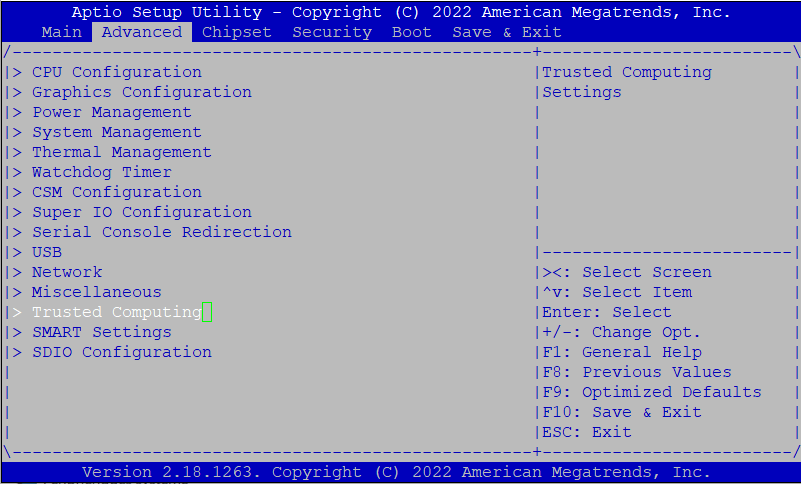
As soon as the Stormshield logo appears on the screen, or the POST appears through the console, press [Del] to access BIOS. - Use the relevant arrows to go to the Advanced panel, then select Trusted Computing and press [Enter].
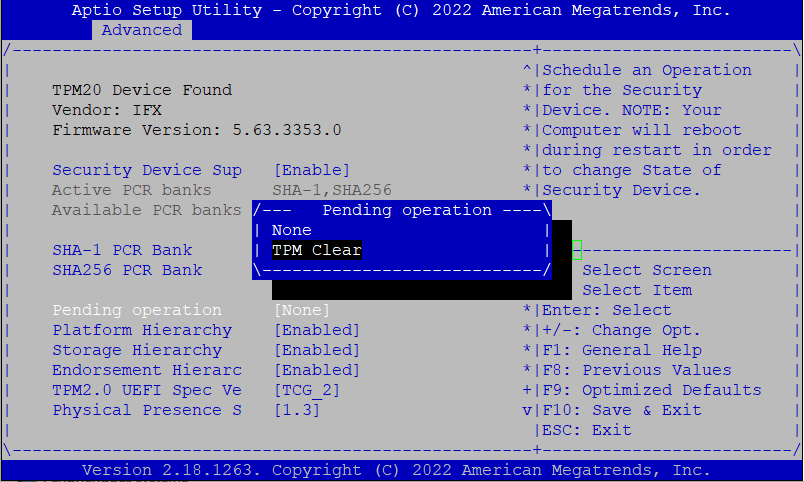
- Select the option Pending operation and choose TPM Clear.
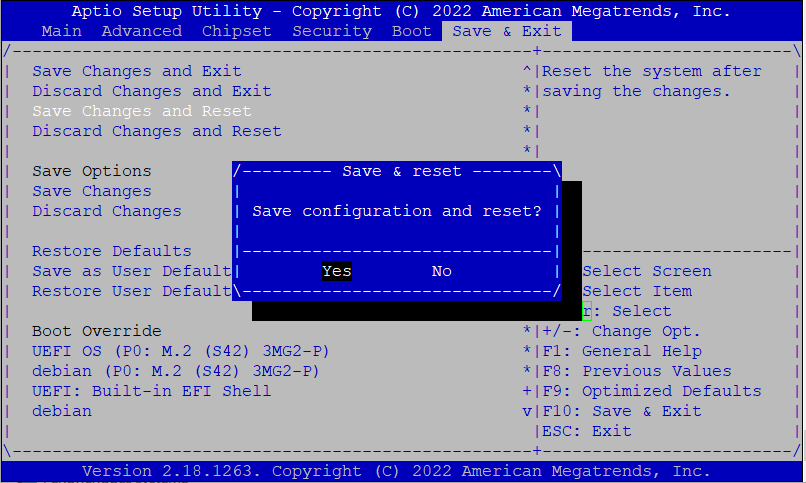
- Select the Save & Reset panel and choose the option Save Changes and Reset.
The firewall will restart.
- Once it has restarted, the SNxr1200 can then be powered off, and its power cord can be unplugged – the operation is complete.
Assembly
Re-assemble the product by following the same steps to dismantle it, in reverse order.