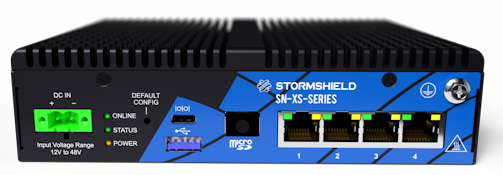
SN-XS-Series-170
Dismantling
- Unscrew the 8 black countersunk screws with a Philips screwdriver.
Two of these screws are covered by the warranty sticker. - Open the appliance.
This operation will tear the warranty sticker. - Locate the storage module (eMMC):
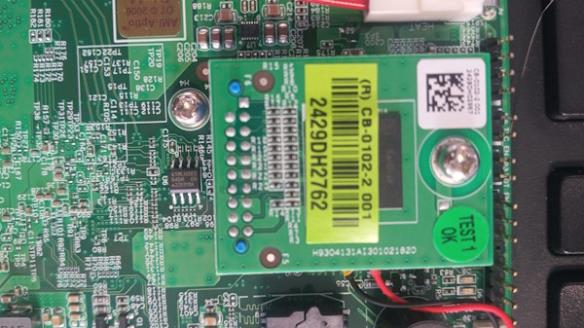
- Remove the screw and unplug the eMMC.
Resetting the TPM
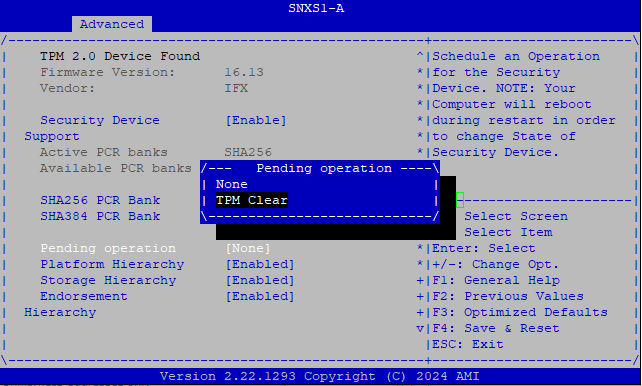
As the TPM (trusted platform module) is welded to the motherboard, it has to be reinitialized in BIOS to work around the fact that the motherboard cannot be removed.
NOTE
A serial link or connection using a monitor and keyboard is required for access to BIOS.
- Power up the firewall.
As soon as the Stormshield logo appears on the screen, or the POST appears through the console, press [Del] to access BIOS. - Use the relevant arrows to go to the Advanced panel, select Trusted Computing and press [Enter].

- Select the option Pending operation and choose TPM Clear.
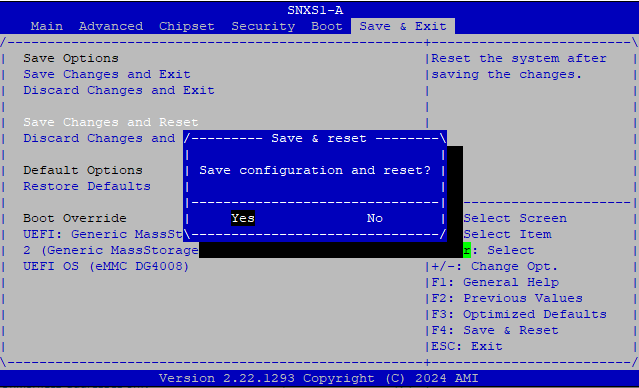
- Select the Save & Exit panel and choose the option Save Changes and Reset.
The firewall will restart.
- Once it has restarted, the SN-XS-Series firewall can then be powered off, and its power cord can be unplugged – the operation is complete.
Assembly
- Plug the eMMC back into the dedicated slot.
- Screw the eMMC fastening screw back in.
- Put both parts of the appliance back together.
- Close it up using the 8 screws.