Manual tunnel configuration
This section explains the required parameters for the manual configuration of options that are necessary for setting up a VPN tunnel, assuming that the installation was properly conducted, and the technical requirements were met.
Configuring a standard tunnel
The chosen approach for standard tunnels involves displaying all IPsec tunnel parameters, including those that cannot be modified. By making all parameters visible, the administrator will be able to accurately confirm the validity of the application's behavior, and remove any ambiguity regarding the applied parameters.
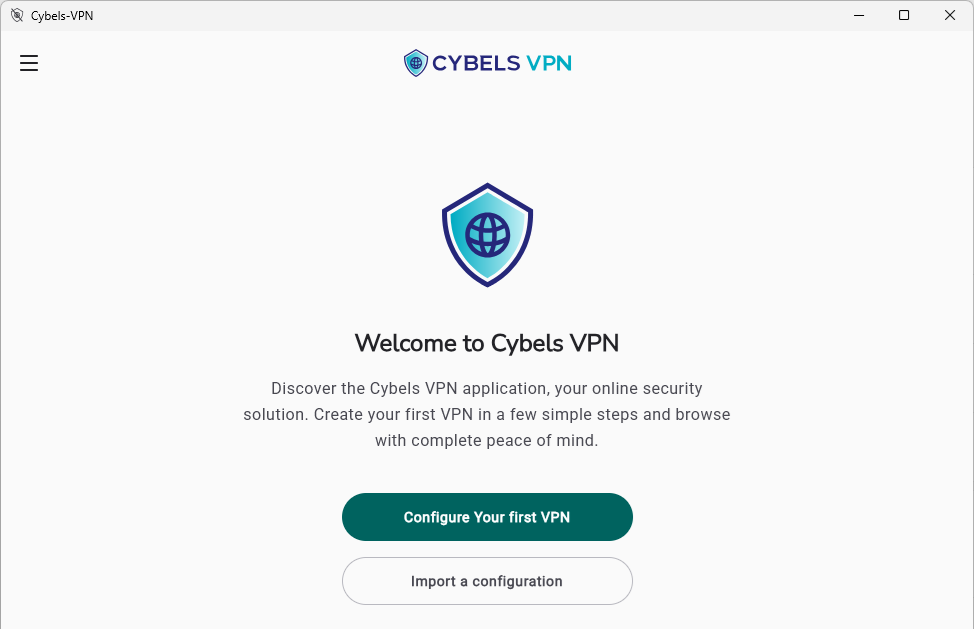
To start configuring a VPN tunnel, open the application and click on "Configure your first VPN".
IMPORTANT
The user certificate and root CA have to be imported in advance into the relevant Windows storage locations. The Cybels VPN application will then search for these certificates respectively in the Personal folder (for user certificates), and in the Trusted root certification authorities folder (for the root CA) in the current user's Windows store.
Cybels VPN only reads certificates with their private keys.
For information, the gateway allows exporting a certificate with its private key in pem and p12 formats, however, Windows only manages certificates + keys in p12 format.
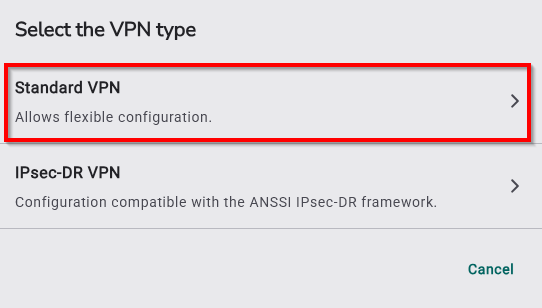
Select the desired VPN type, which is Standard VPN in this case.
Step 1 (General settings)
Next, enter a name for the VPN tunnel that you wish to create, the server address and remote port in the fields "VPN name", "Server address" and "Remote port". If no ports have been configured, the default value 4500 will apply.
The address of the VPN server is the IP address or public DNS of the VPN gateway to which the client connects in order to set up the IPsec tunnel. This is the tunnel's entry point. Currently limited to the IPv4 protocol.
The negotiation and IPsec tunnel management protocol is an Internet Key Exchange version 2 (IKEv2) protocol, which offers a high level of security and performance, even for mobile users.
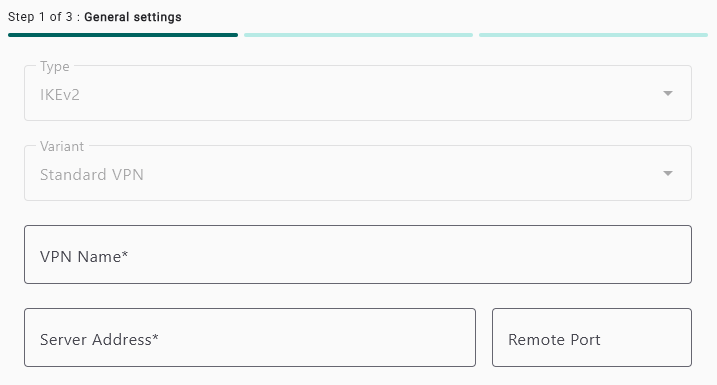
Once you have completed step 1, click on “Next”.
Step 2 (IKE settings)
Step 2 defines the method that the workstation and gateway will use to authenticate and prove their identity.
NOTE
The selected configuration must be strictly aligned with the parameters that were configured on the VPN gateway.
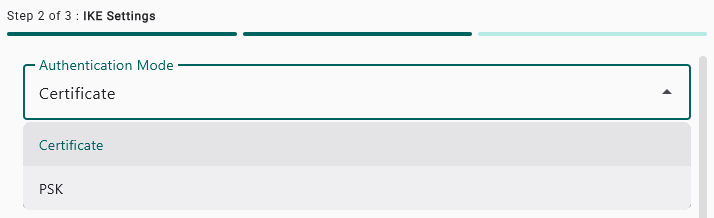
These parameters include "Authentication mode": certificate or PSK (Pre-shared Key), based respectively on certificates or pre-shared keys.
In the VPN tunnel configuration, authentication modes determine how both tunnel endpoints prove their identity before setting up the secure connection.
"Certificate" and "PSK" modes are the two most common IKE authentication methods.
In "Certificate" mode, each tunnel endpoint (client and server) uses an X.509 digital certificate, which is signed by a certification authority (CA) to prove its identity. The certificate contains a public key, as the associated private key remains secret, and trust is established through the CA.
In "PSK" mode, both endpoints share a common secret (password), which is manually configured and identical on both sides. The client and server have to prove that they know the same key, and if the key matches, the tunnel will be set up.
"Certificate" authentication mode
Requirements: Before selecting this mode, ensure that:
- There is a valid user certificate on the workstation (Windows store or hardware medium).
- The server's CA (certification authority) certificate has been installed in the Windows certificate store.
If "certificate" authentication mode is selected: on the server side, the client certificate and trusted certification authority (CA) must then be selected from those automatically detected by the client and suggested in the form of a drop-down list, by clicking on the > symbol.
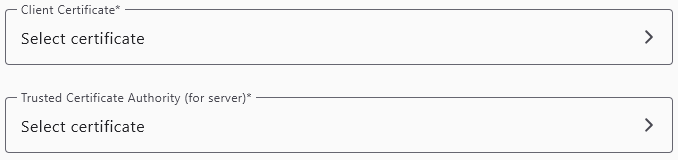
The client certificate is the X.509 digital certificate installed on the user's workstation, and is used as a strong authentication method for the VPN client when setting up the secure tunnel. When the Cybels VPN client uses certificate authentication, the client will present its certificate to the server during IKE negotiation.
This certificate was imported in advance into the hosting medium based on security requirements, client workstation capacities, and the certificate management policy.
There are several possible hosting options:
-
The Windows user certificate store, with the private key protected by software modules
-
A secure hardware medium (cryptographic USB key and smart cards)
Hardware storage modules are available only in the Cybels VPN Premium version.
To simplify the selection of certificates, and to minimize the risk of errors, the application automatically filters certificates. As such, the following are not listed:
Certificates that have expired, or which will only be valid in the future.
Certificates that use an X.509 version lower than v3.
Self-signed certificates (these cannot be used as user certificates).
The trusted certification authority (for the server) is the certification authority (CA) whose certificate the VPN client uses to verify the authenticity of the certificate presented by the VPN server. The client will only accept the connection if the server certificate is signed by this authority, and if it matches the expected identity.
Likewise, only valid authorities are listed. The following are excluded:
CA certificates that have expired, or which will only be valid in the future.
CA certificates in an X.509 version lower than v3.
Note: Unlike client certificates, self-signed CA certificates are accepted and listed.
The CA would also have been imported in advance into the hosting medium based on security requirements, client workstation capacities, and the certificate management policy.
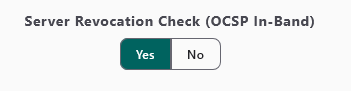
The following field, "Server revocation check", refers to the security mechanism that allows the Cybels VPN client to check whether the VPN server certificate presented during the connection has been revoked by the PKI that issued it.
This verification ensures that the VPN client does not trust a server with a certificate that the CA has explicitly declared to be untrustworthy.
The administrator will then choose to check the server certificate's validity by clicking on "Yes" or "No".
The revocation check is conducted directly in VPN traffic during IKE negotiation, by relying on in-band OCSP, as defined in RFC 4806.
The next section relates to local and remote IDs. The local ID is the identity that the client presents to the server, while the remote ID is the identity that the client expects to receive from the server.
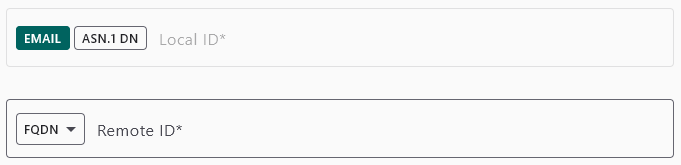
These identities are used during authentication and have to be consistent with the certificates or keys that have been configured.
The administrator can choose one of several modes from the drop-down menu:
-
FQDN (Fully Qualified Domain Name): this is the full domain name that generally corresponds to the CN or DNS of the server certificate (e.g., vpn.entreprise.tld)
-
EMAIL: this is the identity in email address format used as the logical ID that usually corresponds to the SubjectAltName in the client certificate
-
ASN.1 DN: this is the identity based on the Distinguished Name of the X.509 certificate with ASN.1 encoding, which is an exact match to the certificate's Subject
“PSK" authentication mode
If "PSK" authentication mode is selected, the value of the pre-shared key will then need to be entered in the "PSK secret" field.
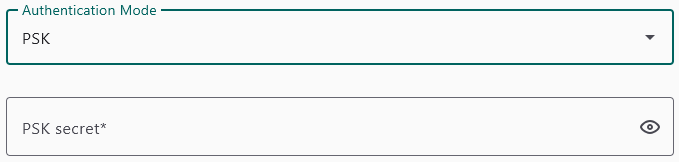
This key is used during IKE negotiation for authentication, and to prove that the client and server are who they claim to be.
The administrator can view the password by clicking on the eye icon. Clicking on the icon a second time will hide the password.
Next, enter the information regarding the Local ID and Remote ID based on the FQDN or Email address.
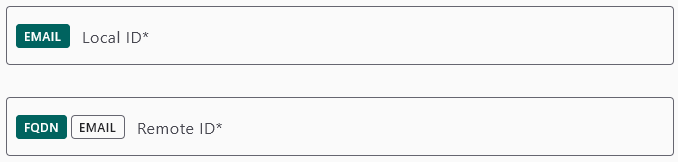
The Local ID and Remote ID are used to formally identify each VPN endpoint during IKE negotiation to inform each device (PC and VPN server) that it is about to set up the tunnel, and to ensure that the right peer is involved.
The administrator can choose the desired ID format by selecting "FQDN” or “EMAIL”.
Cryptography for IKE (certificate or PSK mode)
In the following section, the administrator configures the desired cryptographic aspects for the VPN tunnel. Encryption, integrity, key exchange and pseudo-random function algorithms have to be selected from several suggestions.
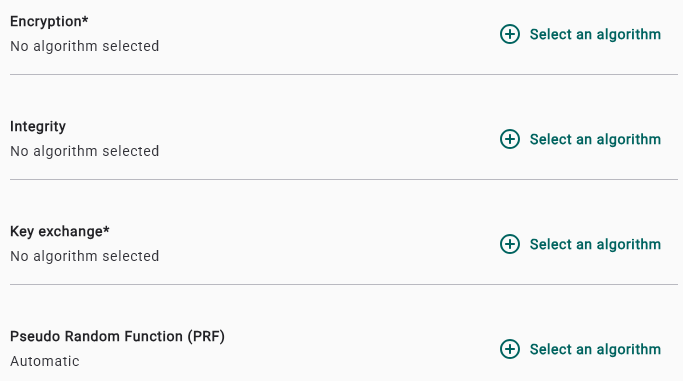
To do so, the administrator starts by clicking on "Select an algorithm" in each section, according to the order in which they appear in the interface (encryption, integrity, key exchange and PRF).
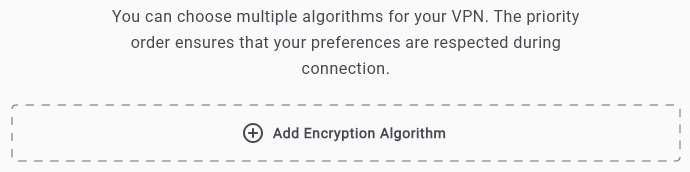
For example, by starting with the "Encryption" section, the following window will appear, making it possible to add one or several encryption algorithms by clicking on "Add Encryption Algorithm".
The following encryption algorithms are available:
- AES CBC 128, AES CBC 192, AES CBC 256, AES CTR 128, AES CTR 192, AES CTR 256, AES GCM-16 128, AES GCM-16 192, and AES GCM-16 256
The following integrity algorithms are available:
- SHA 256, SHA 384, and SHA 512
The following key exchange algorithms are available:
- Group 14 (2048-bit MODP), Group 15 (3012-bit MODP), Group 16 (4096-bit MODP), Group 17 (6144-bit MODP), Group 18 (8192-bit MODP), Group 19 (256-bit ECP), Group 20 (384-bit ECP), Group 21 (521-bit ECP), Group 28 (256-bit ECP), Group 29 (384-bit ECP), and Group 30 (512-bit ECP)
The following pseudo-random function algorithms are available:
- SHA 256, SHA 384, and SHA 512
The following signature algorithms are available:
- RSA PKCS#1 v1.5 SHA-2 256, RSA PKCS#1 v1.5 SHA-2 384, RSA PKCS#1 v1.5 SHA-2 512, ECDSA SHA-2 256, ECDSA SHA-2 384 DER, ECDSA SHA-2 512 DER, and ECDSA 256 RAW
Several algorithms can be chosen from the list above, and an order of priority can also be set by using the arrows found next to the numbers. In the example below, AES CBC 128 will have priority over AES CTR 192 as it has been placed in the first position.
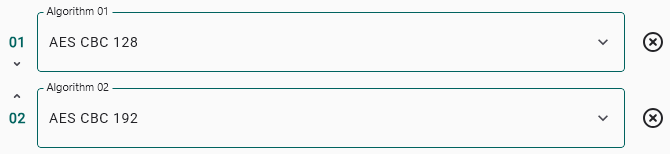
Once you have chosen your encryption algorithms in this first section, click on "Validate" to save your selection.

Follow the same process to select "Integrity", "Key exchange" and "Pseudo-random function (PRF)" algorithms. PRF has an automatic selection option (by default), which means that all algorithms will be supported to facilitate interoperability.
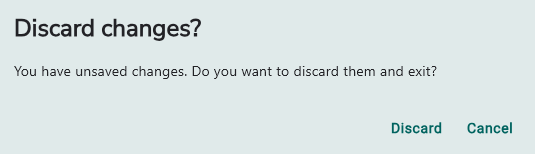
You can backtrack at any time, or decide not to save the current selection, by clicking on "Discard". A pop-up will warn the administrator in this case.
The following field relates to the association lifetime, which corresponds to the validity period of the IKE before its mandatory renewal (IKE reauth).
When this period expires (expressed in seconds), the client will launch a full reauthentication of both endpoints (peers). This process will generate new encryption keys to guarantee that the tunnel remains secure.

If no value has been entered, the default lifetime will be applied. It is 14,440 seconds.
NOTE
The renewal process may briefly disrupt the connection (generally for 2 to 3 seconds) while the new session is being validated.
The next step is the configuration of fragmentation, which makes it possible to segment large messages so that they can pass through certain restrictive networks more easily.
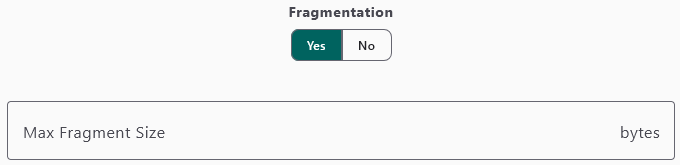
The administrator can choose whether to enable fragmentation by selecting "Yes" or "No".
-
Disabled (No): the client does not offer fragmentation.
-
Enabled (Yes): the client offers fragmentation at the gateway.
-
Max fragment size: sets the upper fragmentation limit in bytes (default value: 1280 bytes).
NOTE
Fragmentation on the client side is only a suggestion. For messages to be effectively fragmented, the feature must be simultaneously enabled and supported on the VPN server.
The last menu enables the selection of "Childless mode". In this mode, only the VPN control connection is set up, without creating the data tunnel. No encrypted network traffic is exchanged.
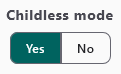
This mode operates as follows:
-
If enabled (Yes): The application sets up only the initial control channel. The data tunnel (Child SA) will only be created when actual network traffic is detected. In this way, gateway resources will not be unnecessarily consumed when there is no data traffic.
-
If disabled (No): The data tunnel will be systematically and immediately created after a successful IKE authentication, even when there is no traffic.
Step 3 (ESP settings)
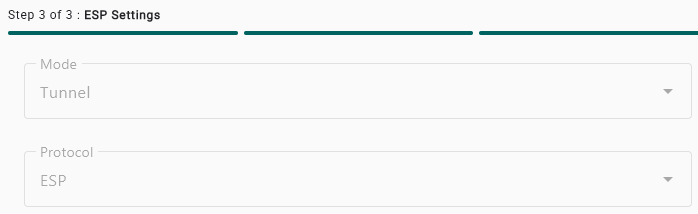
Step 3 consists of configuring the data traffic protection policy.
-
"Tunnel" mode (imposed): Unlike transport mode, tunnel mode encapsulates the entire original IP packet (data + header). This is the only mode that makes it possible to hide the internal architecture of the client network from the public network.
-
"ESP" protocol (imposed): The application relies exclusively on the Encapsulating Security Payload. This is the benchmark protocol that simultaneously guarantees confidentiality (encryption), integrity and the authentication of communications.
NOTE
Both of these fields are displayed in the interface to allow the administrator to confirm the tunnel's compliance, but they are locked to prevent a lower level of security from being configured.
Algorithm selection
Next, the administrator will select the encryption, integrity and key exchange algorithms in the same way as in step 2, by clicking on "Select an algorithm" for each of the parameters below.
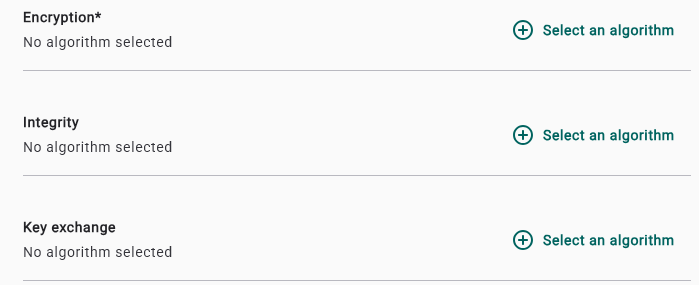
Association lifetime and network configuration
If necessary, set the "Association lifetime" that corresponds to the period for which the ESP keys and the association's security settings will remain valid (rekey). The lifetime is expressed in seconds. If no value has been entered, the default lifetime will be applied. It is 900 seconds.

NOTE
The rekey process has been designed to be transparent, and generally does not disrupt traffic, unlike IKE reauthentication, which may cause a brief disruption.
The administrator then sets the network configuration mode, "Automatic" or "Manual". This configuration involves setting the characteristics of the network traffic to be protected, meaning the traffic that has to pass through the IPsec tunnel.

In automatic mode (also known as "Configuration Payloads" in IKEv2), network parameters are automatically provided by the remote IPsec server.
In manual mode, the administrator configures all the following fields: "IP address", "Remote network", "Primary DNS server", and "Secondary DNS server".
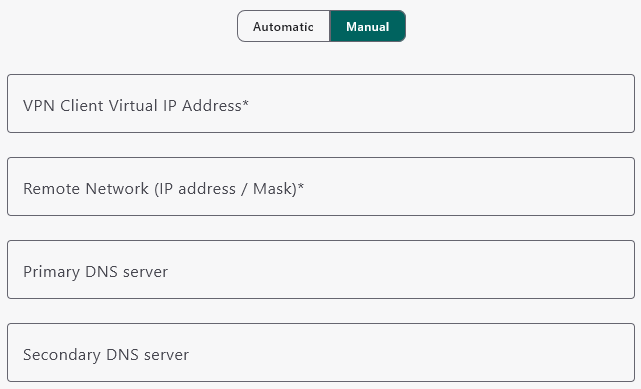
-
The IP address is used to route traffic, and can also be used as the client’s unique identifier on the network.
-
The remote network is the network found on the other side of the VPN tunnel, which the client has to access. The expected format is expressed in CIDR address notation IP/mask.
-
The primary DNS server is the priority domain name resolution server, and has to be accessible from the network or VPN.
-
The secondary DNS server will take over when an error occurs or when there is an issue with the configuration of the primary server.
Extended Sequence Number (ESN)
In the last step, the administrator will choose whether to enable the ESN. This parameter makes it possible to use longer sequence numbers (64 bits instead of 32 bits) for IPsec packets. This parameter is negotiated by default.
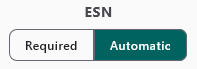
Without ESN ("No" selected), the counter is set to 32 bits and can quickly overflow onto very fast links or very active tunnels.
With ESN ("Yes" selected), the counter switches to 64 bits, which practically removes the risk of overflow, and the tunnel is more robust over the long term.
To complete step 3, click on "Create tunnel".

The implemented signature algorithms are RSA PKCS#1 v1.5 SHA-2 256, RSA PKCS#1 v1.5 SHA-2 384, RSA PKCS#1 v1.5 SHA-2 512, ECDSA SHA-2 256, ECDSA SHA-2 384 DER, ECDSA SHA-2 512 DER, and ECDSA 256 RAW.
NOTE
Algorithms cannot be selected for signatures. The contents of the certificate will determine the signature algorithm used.
Configuring a "Diffusion Restreinte" tunnel
The Cybels VPN client (Premium version) makes it possible to automatically configure VPN tunnels that comply with the IPsec Diffusion Restreinte (DR) guidelines set out by the ANSSI.
The IPsec DR profile aims to guarantee a high and consistent level of security for IPsec VPNs used in:
-
Government agencies,
-
Vital operators,
-
Systems that handle sensitive data, but which are not classified as national defense secrets.
In this mode, the administrator does not need to manually select all parameters imposed by the IPsec DR profile (cryptographic suites, childless mode, etc.). These settings are applied natively by the application during initialization, thereby guaranteeing a configuration that complies with ANSSI guidelines, while drastically reducing the risk of human error.
IMPORTANT
In order for the connection to be successful, the VPN gateway (firewall or hub) must also be configured in an IPsec DR-compliant mode. All devices in the architecture have to meet these ANSSI requirements.
To initiate the configuration of an IPsec DR VPN tunnel, click on "Add a VPN", then select "IPsec-DR VPN".
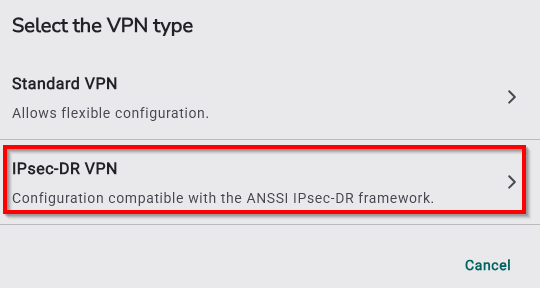
Step 1 (General settings)
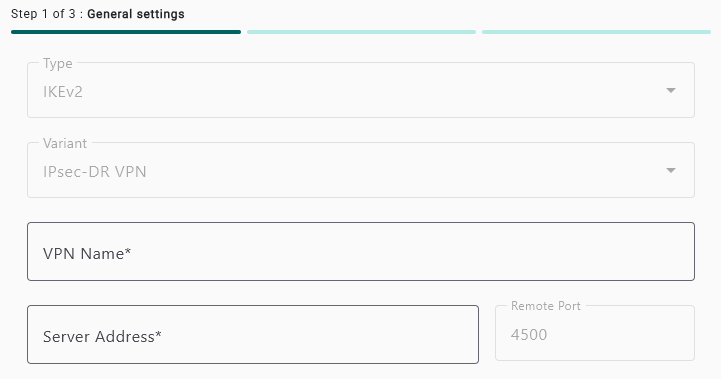
Next, enter a name for the VPN tunnel that you wish to create, as well as the server address in the "VPN name" and "Server address" (IP address or FQDN of the VPN gateway) fields.
NOTE
Currently, only the IPv4 protocol is supported.
The default port is 4500 (NAT-T) when this mode is selected.
NOTE
In line with the imposed security profile, this port cannot be modified, in order to guarantee the use of the NAT traversal standard, as required by the guidelines.
Cryptographic settings
Cryptographic suites are pre-configured according to IPsec DR mode requirements. For the purpose of clarity, these parameters are hidden in the interface.
Do note that the application offers the following combinations during negotiation:
|
|
Encryption |
Integrity |
Key exchange |
PRF |
|
Suite 1 |
AES GCM-16 256 |
None* |
Group 19 (256-bit ECP) |
SHA 256 |
|
Suite 2 |
AES GCM-16 256 |
None* |
Group 28 (256-bit Brainpool ECP) |
SHA 256 |
|
Suite 3 |
AES CTR 256 |
SHA 2256 |
Group 19 (256-bit ECP) |
SHA 256 |
|
Suite 4 |
AES CTR 256 |
SHA 2256 |
Group 28 (256-bit Brainpool ECP) |
SHA 256 |
(*) Integrity is natively guaranteed through the GCM encryption mode.
Step 2 (IKE settings)
By default, the authentication mode is "Certificate" in the IPsec DR variant. PSK (pre-shared key) mode is disabled and cannot be selected for IPsec DR tunnels.
To configure this step, refer to chapter "Certificate" authentication mode.
Childless mode is enabled by default and imposed, in line with the IPsec DR guidelines.
Step 3 (ESP settings)
Step 3 consists of entering the ESP (Encapsulating Security Payload) parameters that will be used to protect data passing through the VPN.
The administrator will then select the association lifetime and network configuration mode, "Automatic" or "Manual".
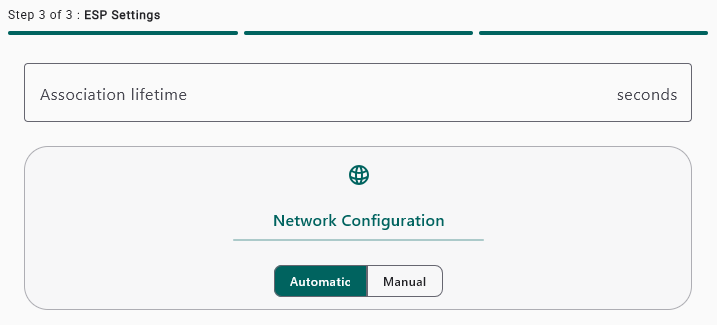
Refer to chapter Association lifetime and network configuration.
The ESN is forced to 64 bits in the case of a DR type tunnel.
Cryptographic settings
Cryptographic suites are pre-configured according to IPsec DR mode requirements. For the purpose of clarity, these parameters are hidden in the interface.
Do note that the application offers the following combinations during negotiation:
|
|
Encryption |
Integrity |
Key exchange |
|
Suite 1 |
AES GCM-16 256 |
None* |
Group 19 (256-bit ECP) |
|
Suite 2 |
AES GCM-16 256 |
None* |
Group 28 (256-bit Brainpool ECP) |
|
Suite 3 |
AES CTR 256 |
SHA 2256 |
Group 19 (256-bit ECP) |
|
Suite 4 |
AES CTR 256 |
SHA 2256 |
Group 28 (256-bit Brainpool ECP) |
(*) Integrity is natively guaranteed through the GCM encryption mode.
The implemented signature algorithm is: ECDSA 256 RAW
To complete step 3, click on "Create tunnel".
Finalizing the creation of the tunnel
The VPN client will show a recap of all the parameters that were set in steps 1, 2 and 3, allowing the administrator to make changes if necessary, by clicking on "Back to configuration", or by confirming the configuration and clicking on "Save configuration".

By clicking on "Back to configuration", the administrator will be redirected to step 3, and can browse through the various steps by using the "Previous" button.

By clicking on "Save configuration", the tunnel will be created. A toast notification will indicate that the tunnel was successfully created.
All parameters will then be grouped together in the "General", "IKE" and "Child SA" tabs for consultation.
Additional actions
The administrator has 2 additional buttons on the recap page to Edit or Delete the created tunnel.

Configuring multiple tunnels
Multiple VPN tunnels can be configured. To do so, simply repeat the same steps described for the creation of a tunnel.
All configured tunnels can be found in the application's "Configure my VPN" side menu.
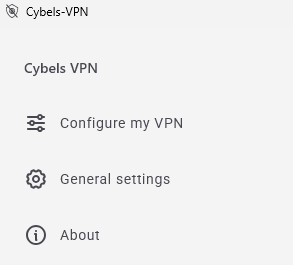
Click on this menu to view and obtain information, and to edit and delete tunnels.
In the example below, 2 tunnels have been configured: test and Cybels VPN Client.
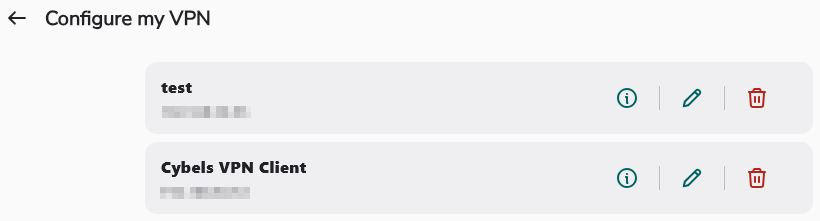
All configured VPNs are shown on the application's welcome page.
In the example below, 2 VPNs are available:

As soon as a green dot appears next to the VPN, this means that this VPN's tunnel is active.

The following chapter describes how to activate a VPN tunnel.
NOTE
Although multiple VPN tunnels can be configured, only one tunnel can be active at a time.