Updating the TPM firmware
This section presents the steps involved in updating the firmware on TPM models 9672 and 9665.
Some of the images below show BIOS on SN-S-Series model firewalls. As such, the display may vary depending on the model used, but the process remains the same.
Connecting to the SNS firewall
-
Shut down the SNS firewall, then unplug its electrical power cord (or both cords, if it has redundant power supply modules).
-
Insert the USB drive that was prepared earlier into a USB port on the SNS firewall.
-
Connect the computer to the SNS firewall using an appropriate cable, and log in with your terminal emulator in console mode;
- or -
Connect a USB keyboard and a monitor to the SNS firewall using an appropriate cable.
Disabling the TPM and Secure Boot
-
Plug the power cord(s) into the SNS firewall and start it up.
-
Once the SNS firewall starts up, press [Del] several times to stop its startup sequence, and access BIOS.
If the startup sequence is not stopped quickly enough, the SNS firewall will start up on the USB drive, and the update process will fail. You will then need to restart the SNS firewall and stop its startup sequence at the right moment.
-
In the Advanced tab, select Trusted Computing and press [Enter].
-
Disable the Security Device Support setting by selecting Disable.
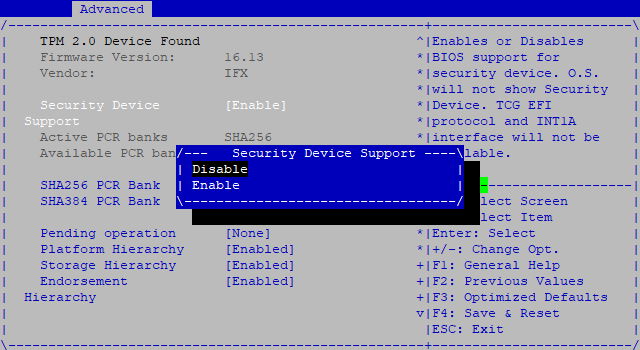
-
Press [Esc] to go back to the previous window.
-
In the Security tab, select Secure Boot and press [Enter].
-
Disable the Secure Boot setting by selecting Disabled. If this status was already selected, this means that Secure Boot has already been disabled.
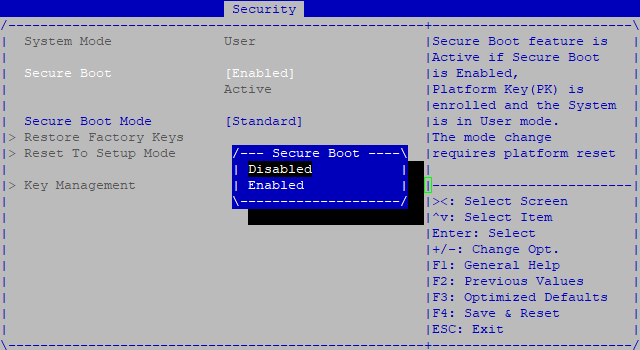
-
Press [Esc] to go back to the previous window.
-
In the Save & Exit tab, select Save Changes and Reset, and press [Enter].
-
In the Save & Reset window, select Yes, and press [Enter].
Updating the TPM firmware
IMPORTANT
The update process is automatic and lasts around five minutes. Once the process is run, it must never be interrupted, and the SNS firewall must not be disconnected from the power supply. If this occurs, the TPM will be completely unable to run.
- The SNS firewall will start up on the USB drive, and the update process will begin.
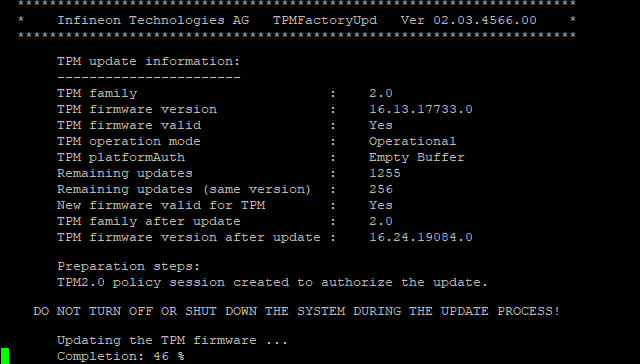
- Wait several moments.
- Once the update is complete, the firewall will fully restart before showing the connection prompt for firewall administration.
-
NOTE
If the console remains frozen after the SNS firewall starts up, quit the session on the terminal emulator, and open a new one until the display is restored.
Enabling the TPM and Secure Boot after the update is complete
- Log in to the firewall console using an administrator account, then run the following command to restart the SNS firewall:
reboot
- Remove the USB drive.
- Once the SNS firewall starts up, press [Del] several times to stop its startup sequence, and access BIOS.
- In the Advanced tab, select Trusted Computing and press [Enter].
- Enable the Security Device Support setting by selecting Enable.
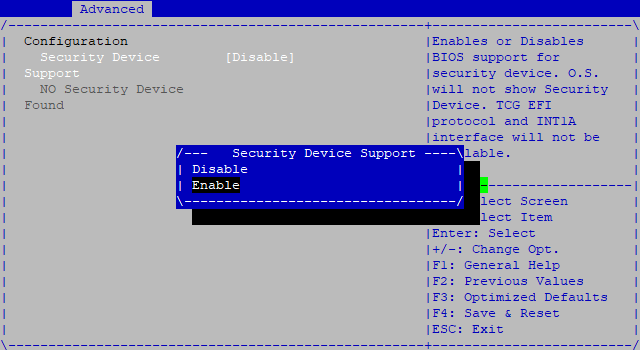
- Press [Esc] to go back to the previous window.
- In the Security tab, select Secure Boot and press [Enter].NOTE
As of SNS version 4.8.7, Secure Boot monitors the integrity of the UEFI binaries in the boot sequence of the SNS firewall. You are therefore strongly advised to enable this feature to guarantee the integrity of the sequence. - Enable the Secure Boot setting by selecting Enabled.
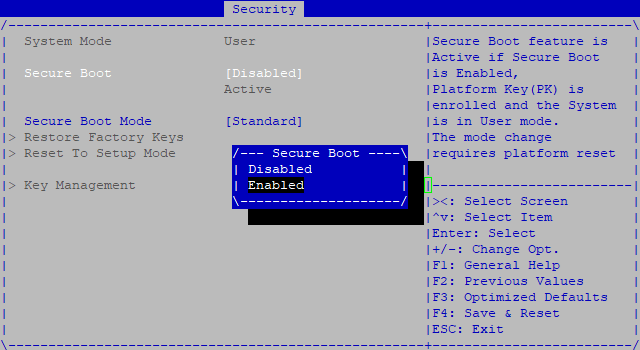
If an Install factory defaults window appears, select No and press [Enter]. Otherwise, the TPM (Security Device Support setting) will remain disabled.
- Press [Esc] to go back to the previous window.
- In the Save & Exit tab, select Save Changes and Reset, and press [Enter].
- In the Save & Reset window, select Yes, and press [Enter].
- Let the firewall complete the startup process.
- Log in to the firewall with the super administrator account (admin account).
- Seal the TPM with the system's new technical characteristics, by using the command:
tpmctl -sv -p "your TPM password"
Your TPM is now updated and operational once again.