SNi10
Enabling Secure Boot in the SNS firewall’s UEFI
-
Connect the computer to the SNS firewall using the USB-A to USB-C cable.
-
Open the terminal emulator and enter the serial port and baud rate (115200).
-
Start the SNS firewall and immediately press [Del] several times to stop the SNS firewall startup sequence.
-
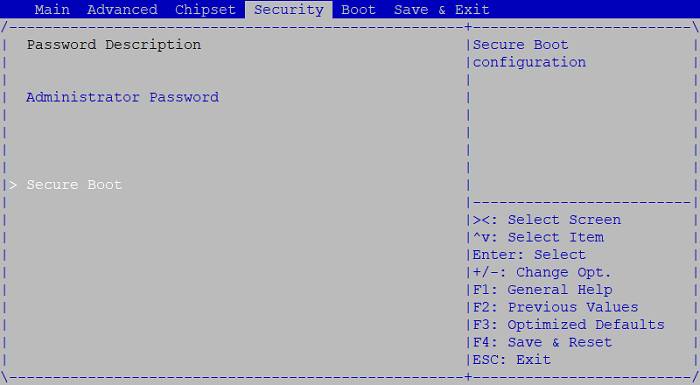
Go to the Security tab by using the arrow keys.

-
Select Secure Boot and press [Enter].
-
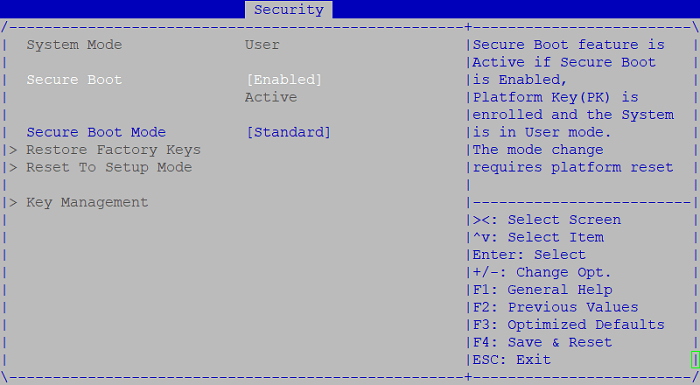
Change the status of the Secure Boot parameter to Enabled.
-
Change the status of the Secure Boot Mode parameter to Standard.

-
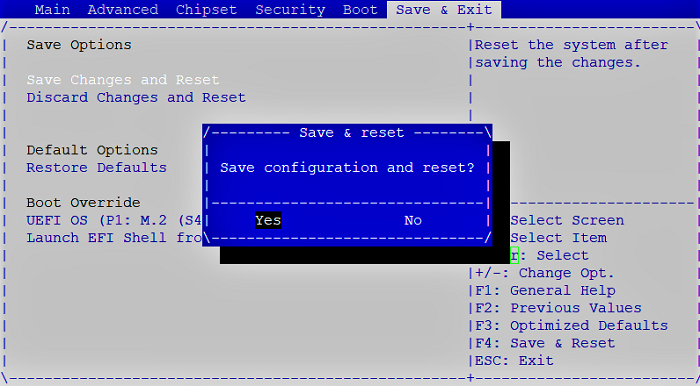
Press [Esc] and go to the Save & Exit tab.
-
Select Save Changes and Reset and press [Enter].
-
In the Save & Reset window, select Yes then press [Enter].

Disabling Secure Boot in the SNS firewall’s UEFI
-
Connect the computer to the SNS firewall using the USB-A to USB-C cable.
-
Open the terminal emulator and enter the serial port and baud rate (115200).
-
Start the SNS firewall and immediately press [Del] several times to stop the SNS firewall startup sequence.
-
Go to the Security tab by using the arrow keys.

-
Select Secure Boot and press [Enter].
-
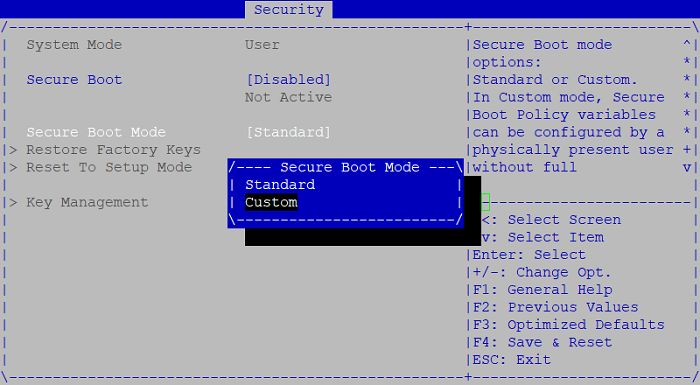
Change the status of the Secure Boot parameter to Disabled.
-
Change the status of the Secure Boot Mode parameter to Custom.

-
Press [Esc] and go to the Save & Exit tab.
-
Select Save Changes and Reset and press [Enter].
-
In the Save & Reset window, select Yes then press [Enter].
