Configuring the SPNEGO authentication method
To configure the SPNEGO authentication method, go to the Configuration > Users > Authentication module in the web interface. Then refer to the following procedure.
In this example, SPNEGO is configured on the firewall’s internal interfaces, through which clients can log on.
Available methods tab
- Click on Add a method or Enable a method (according to the version installed on the SNS firewall) and select Transparent authentication (SPNEGO).
- Fill in the Service name and Domain name fields with the information provided at the end of the log file (SPN and DOMAIN respectively), taking care the use the same case that was used when running the script on the domain controller.
- Select the keytab file created using the spnego.bat script.
- Apply changes.

Authentication policy tab
- Create a new rule (standard rule).
- If no directories matching the Active Directory domain have been defined on the firewall, use the domain "none" (Any user@none) for users.
- Select the connection source (in interface in the example).
- Select the SPNEGO authentication method, then confirm.
- Enable the rule by double-clicking in the Status column.

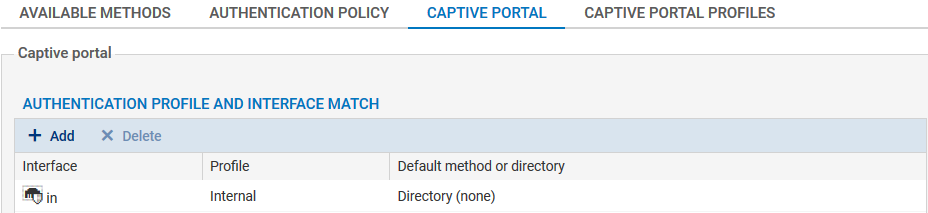
Captive portal tab
Next, associate the selected authentication profile (Internal in the example) with the various interfaces from which users will log on:
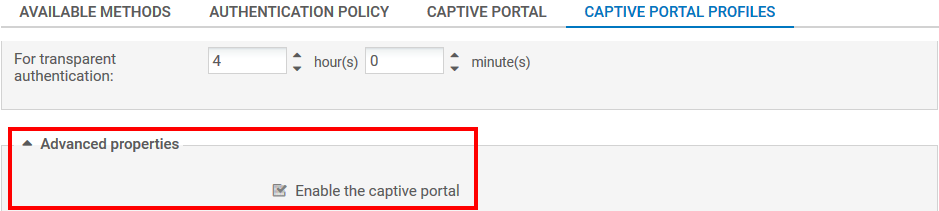
Captive portal profiles tab
- In the authentication profile selected (Internal in the example), select the directory that will be used by default. It must match the directory entered in the authentication rule (None if no directories matching the Active Directory domain have been defined on the firewall).
- In the Advanced properties, ensure that the Enable the captive portal checkbox has been selected.