Configuring the DNS server
One part of the SPNEGO mechanism requires the resolution of DNS names and in particular, the name of the firewall used. It is therefore necessary to add an entry to the DNS server so that the firewall’s name can be resolved.
By default, its name is the firewall's serial number. Refer to the section Configuring SPNEGO in high availability on how to use a different name.
The configuration information described below is specific to DNS servers hosted on Microsoft Windows Server hosts (the AD domain controller, for example).
Creating the reverse lookup zone
If the reverse lookup zone dedicated to the network that includes the firewall's IP address does not yet exist, you need to create it (example: for the network 192.168.56.0/24, it is a 56.168.192-in-addr.arpa registration).
In this case, on the DNS server:
- In the Server Manager dashboard, click on the Tools > DNS menu.
- Right-click on Reverse lookup zone.
- Select New zone...
The reverse lookup zone wizard then launches. - Follow the various steps in the wizard, ensuring that you use the same parameters below:
- Select Main zone.
- Check that the To all DNS servers running on domain controllers in this domain: domain_name checkbox has been selected.
- Select Reverse IPv4 lookup zone.
- Enter the network containing the firewall's IP address.
Examples:
10.10 for a 10.10.0.0/255.255.00 network
192.168.56 for a 192.168.56.0/255.255.255.0 network - Check that the Allow only secure dynamic updates (recommended for Active Directory) checkbox has been selected.
Creating the registration matching the name of the firewall
On the DNS server:
- In the Server Manager dashboard, click on the Tools > DNS menu.
- Expand the Forward lookup zones tree.
- Right-click on the name of your domain.
- Select New host (A or AAAA).
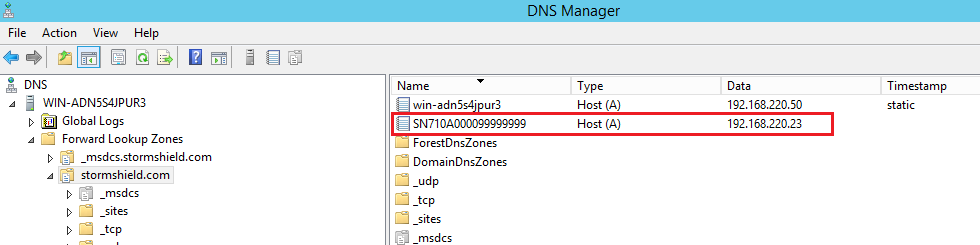
- In the Name field, enter the firewall's serial number.
- In the IP address field, enter the firewall’s IP address.
- Click on Add a host.
- Click on Finish.
The new host will be added to the window on the right in the DNS Manager.
Using a client workstation, check whether name resolution works for the firewall's name (with the ping command, for example).