Installing the Stormshield SSL VPN client v4
This section explains the standard installation process of the Stormshield SSL VPN client v4 with the installation program, either via a group policy (GPO) or via a script.
NOTE
If you are using the Stormshield VPN SSL client in version 5, refer to the Stormshield SSL VPN Client v5 documentation.
NOTE
The Stormshield SSL VPN client cannot be downgraded to an earlier version. In addition, once the SSL VPN client is installed, ensure that it can access the notification zone in the Windows 11 system tray. For further information, refer to Limitations and explanations on usage.
Downloading the Stormshield SSL VPN client v4
The Stormshield SSL VPN client installation program exists in two formats:
| Format | Description |
|---|---|
| .exe |
A single executable file that groups all languages and Windows versions supported. For use in a standard installation or deployment via script. |
| .msi |
Several .msi packages available depending on the languages and Windows versions supported. For use in a deployment via a group policy (GPO) or via a script. |
The Stormshield SSL VPN client can be download in the desired format from:
-
Your MyStormshield area.
Log in to your MyStormshield area and go to Downloads > Downloads > Stormshield Network Security > SSL VPN.
Enter the following command to check the integrity of retrieved binary files:
CertUtil -hashfile <filename> SHA256
Compare the result obtained with the hash indicated in your MyStormshield area under the SHA256 column in the download table.
Installing the Stormshield SSL VPN client with the .exe installation program
You must be the local workstation administrator or enter the login and password of an administrator account in order to install the Stormshield SSL VPN client.
-
Log in to the user session in which you wish to install the Stormshield SSL VPN client.
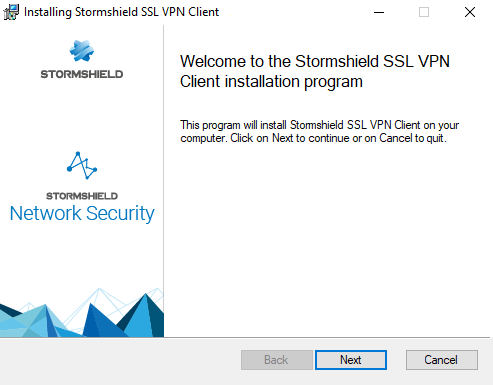
- Run the installation program (.exe file) that was downloaded earlier.
-
Follow the steps in the installation wizard.
You can customize default settings for connections to the VPN:
-
The IP address or FQDN of the firewall,
-
Whether the VPN configuration is to be retrieved in automatic mode,
-
Whether multifactor authentication is to be used,
-
Whether the Windows session user in question is to be used as the ID.
-
Deploying the Stormshield SSL VPN client via a group policy (GPO)
You can directly deploy the .msi package downloaded earlier, or edit it to make it easier for users to connect to the SSL VPN, by customizing certain settings.
Creating an .msi package to customize default settings for connections to the VPN
The following settings can be customized:
-
The IP address or FQDN of the firewall,
-
Whether the VPN configuration is to be retrieved in automatic mode,
-
Whether multifactor authentication is to be used,
-
Whether the Windows session user in question is to be used as the ID.
To create the .mst package:
-
On a workstation equipped with Microsoft Orca, go to the folder containing the Stormshield SSL VPN client's .msi package, right-click and select Edit with Orca.
-
Click on Transform > New Transform.
-
Select the Property table.
-
To ensure that the Windows user of the session in question is used as the login, set the Value of the USE_DEFAULT_USERNAMEU property to 1.
-
To ensure that the SSL VPN client uses manual mode by default, set the Value of the AUTOMATIC_MODE property to 0,
-
To customize the IP address or on FQDN of the firewall:
-
Right-click and choose Add Row.
-
In the Property field, enter DEFAULT_ADDRESS.
-
In the Value field, enter the firewall’s IP address or FQDN.
-
Click on OK.
-
-
To indicate whether multifactor authentication has to be used:
-
Right-click and choose Add Row.
-
In the Property field, enter ENABLE_OTP.
-
Set the Value field to 1 to use multifactor authentication, or to 0 to not use it.
-
Click on OK.
-
-
Click on Transform > Generate Transform.
-
Save the .mst package in the same folder as the .msi package.
Configuring deployment via GPO
-
Run the server manager on the domain controller.
-
In the upper menu bar, click on Tools > Group Policy Management.
-
In the list on the left, right-click on the Microsoft Active Directory domain name and select Create a GPO in this domain, and link it here...
-
Name the GPO and click on OK.
-
In the list on the left, right-click on the name of the GPO that you have just created, and select Edit.
The GPO editing window opens.
-
In the menu to the left of the GPO, expand the menu Computer Configuration > Policies > Software Settings.
-
Right-click on Software installation, select New > Package, then select the Stormshield SSL VPN client .msi installation package.
-
Select Advanced mode and click on OK.
The GPO editing window opens.
-
If you wish to do so, you can rename this installation instance.
-
In the Changes tab, you can associate the .mst package created earlier with the Stormshield SSL VPN client's installation GPO. To do so, click on Add..., select the .mst package and click on Open.
-
Click on OK.
The installation will automatically run when a workstation connects to the company network.
Deploying the Stormshield SSL VPN client via a script
-
Open a command prompt as an administrator.
-
Go to the folder containing the .exe file or .msi package downloaded earlier.
-
Type the corresponding command:
-
For an .exe file:
Stormshield_SSLVPN_Client_4.X.Y_x64.exe [PARAMETERS]
-
For an .msi package:
msiexec /i Stormshield_SSLVPN_Client_4.X.Y_language_x64.msi [PARAMETERS] /qn
You can facilitate users' connection to the SSL VPN by adding the following parameters to the command:
-
DEFAULT_ADDRESS=[IP address or FQDN of the firewall],
-
AUTOMATIC_MODE=[0 for manual mode, 1 for automatic mode],
-
USE_DEFAULT_USERNAME=[0 for the field to stay empty, 1 for the Windows user of the session in question to be used as the login],
-
ENABLE_OTP=[0 to not use multifactor authentication, 1 to use a method].
-
-
Run the command.
Example of a command enabling the deployment of the .exe file:
Stormshield_SSLVPN_Client_4.0.0_x64.exe DEFAULT_ADDRESS=vpn.company.tld
Example of a command enabling the deployment of an .msi package:
msiexec /i Stormshield_SSLVPN_Client_4.0.0_en_x64.msi DEFAULT_ADDRESS=vpn.company.tld AUTOMATIC_MODE=1 ENABLE_OTP=0 /qn
The installation will automatically run when a workstation connects to the company network. A command prompt will appear on the desktop and a status bar indicates the progress of the installation.