Appendix: installing, configuring and using OpenVPN Connect
This appendix explains the steps involved in installing, configuring and using OpenVPN Connect, and includes instructions on setting up SSL VPN tunnels and viewing the client's logs. This information can be supplemented by the information provided on the OpenVPN publisher website.
Installing OpenVPN Connect
On a workstation: download the application from the OpenVPN website and install it.
On a mobile device: install the application from the Google Play Store or the App Store.
Configuring OpenVPN Connect
You will need to import the configuration components (CA, certificate, private key, etc.) that OpenVPN Connect must use, compiled in an .ovpn file.
-
Retrieve the .ovpn file. Follow the process described in the section Retrieving the SSL VPN configuration (.ovpn file).
- Import the .ovpn file into OpenVPN Connect:
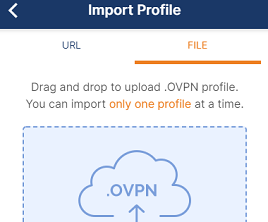
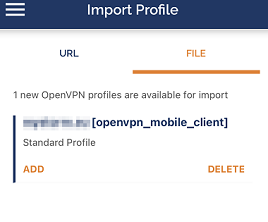
- On a workstation: open the application and import the file via Import Profile > File,
- On a mobile device: attempt to open the file, then from the choices given in the device, select OpenVPN Connect. The Import Profile > File window appears.


- Next, follow the instructions given.
Perform this operation during the initial connection, and also when the SSL VPN configuration of the SNS firewall is modified, e.g., after a certificate is changed.
Setting up an SSL VPN tunnel with OpenVPN Connect
Connecting SSL VPN tunnels
-
Launch OpenVPN Connect.
-
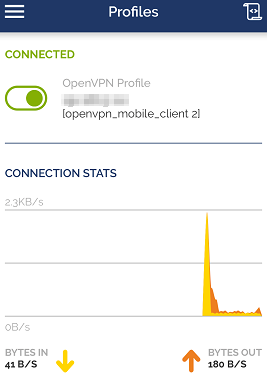
For the desired profile, slide the connection cursor to the right or click on it.
-
If the user's password was not saved, enter it.
-
OpenVPN Connect authenticates on the SNS firewall. Once the connection is set up, information about the SSL VPN tunnel will appear.

Disconnecting SSL VPN tunnels
Slide the connection cursor to the left or click on it.
Reading OpenVPN Connect logs
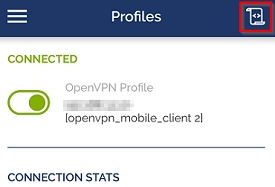
To read OpenVPN Connect logs, in the profile window, click on the icon in the shape of a newspaper on the right at the top.

