Configuring the captive portal
This section explains how to configure the captive portal to allow Stormshield SSL VPN clients, and users or user groups, to set up SSL VPN tunnels.
Configuring authentication profile and interface match
-
Go to Configuration > Users > Authentication, Captive portal tab.
-
In the Authentication profile and interface match grid, click on Add.
-
In the Interface column, select the source interface of SSL VPN connections (e.g., out). If you are using a PPPoE or VLAN interface, select it instead of the physical parent interface.
-
In the Default method or directory column, if the directory entered matches the directory of the users who are setting up SSL VPN tunnels with the SNS firewall, the value of the Profile column does not need to be changed. This configuration allows users to simply enter their user name in their SSL VPN client to set up the SSL VPN tunnel.
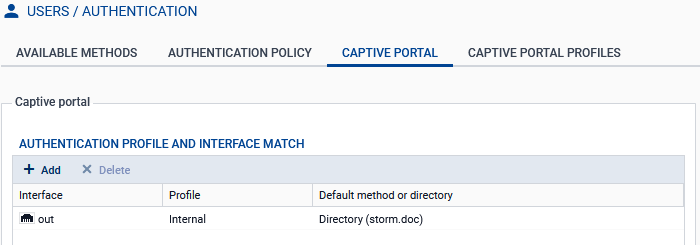
Otherwise, users will need to enter their user name with the directory authentication domain (identifiant@domain.tld) in their SSL VPN client to set up the SSL VPN tunnel. If you want users to simply enter their user name, adapt the configuration:
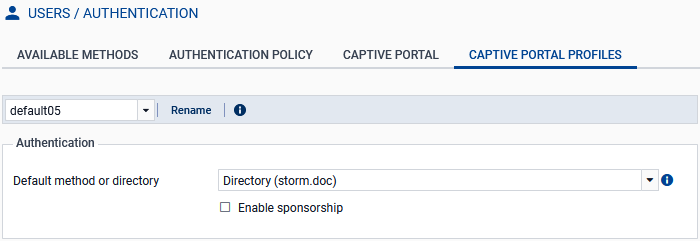
- In the Profile column, select another profile (e.g., default05).
- In the Captive portal profiles tab, select this other profile and choose the right directory in the Default method or directory field.
Checking whether the captive portal is enabled
-
Go to Configuration > Users > Authentication, Captive portal profiles tab.
-
Select the profile used for the SSL VPN connections.
-
In the Advanced properties section, ensure that the Enable the captive portal checkbox has been selected.
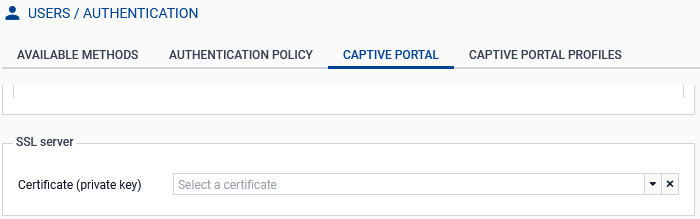
Customizing the captive portal's certificate
You can customize the certificate presented by the SNS firewall when accessing the captive portal. If this certificate is not customized, the SNS firewall will present a default certificate:
- On SNS in version 4, this will be a certificate corresponding to the SNS firewall serial number,
- On SNS in version 5, this will be a self-generated certificate for this access.
To customize the captive portal's certificate:
-
Go to Configuration > Users > Authentication, Captive portal tab.
-
In the Certificate (private key) field, select the new certificate. If necessary, you can add a new certificate (server identity) in Configuration > Objects > Certificates and PKI.
If any of the following criteria applies to the selected certificate:
- The certificate was not signed by a trusted certification authority,
- The certification authority has not been deployed on users' workstations,
- The certificate's CN does not match the SNS firewall address that is used for connections to the SSL VPN. This is the case, for example, with the default certificate presented by the SNS firewall.
The certificate cannot be automatically validated by the Stormshield SSL VPN client or web browser, and a window indicating a probable security risk will appear. Each user must then ensure that the connection is secure by checking the certificate information, and then indicate that they trust the certificate presented by the SNS firewall to set up the SSL VPN tunnel. Although this message does not prevent users from proceeding, we recommend explaining it to your users.