Configure the SSL VPN service
This section explains how to enable and configure the SSL VPN service on the SNS firewall.
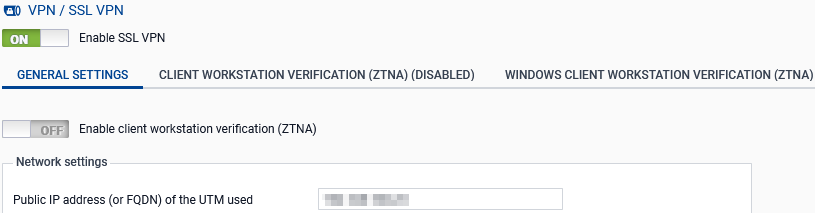
Go to Configuration > VPN > SSL VPN.
Enabling the SSL VPN service
| Field | Description |
|---|---|
|
Enable SSL VPN
|
Set the selector to ON to enable the SSL VPN service. |


Configuring the general settings of the SSL VPN service
On SNS in versions SNS 4.8 LTSB and 5, these settings can be configured in the General settings tab. On SNS in version 4.3 LTSB version, there is no tab.
NOTE
As of SNS version 4.8.5, a warning will prompt you to disable the LZ4 compression feature if it is enabled. This scenario is described in the section Troubleshooting.
| Field | Description |
|---|---|
|
Enable client workstation verification (ZTNA)
|
This field appears in this tab on SNS in version 5. On SNS in version 4.8 LTSB, the feature can be enabled in the Client workstation verification (ZTNA) tab. Set the selector to ON to enable the verification of client workstation compliance. If you have not yet set the criteria for client workstation verification, define them before enabling verification. For more information, refer to the section Configuring client workstation verification (ZTNA). |
Network settings section
| Field | Description |
|---|---|
| Public IP address (or FQDN) of the UTM used |
Indicate the IP address that users must use in their SSL VPN client to reach the SNS firewall and set up SSL VPN tunnels. You can specify an FQDN or IP address.
|
| Available networks or hosts |
Select the object representing the networks or hosts that will be reached through the SSL VPN tunnel. This object makes it possible to automatically set on your organization's devices the routes needed to reach resources that can be accessed through the SSL VPN tunnel. To more granularly allow or prohibit traffic between your users' devices and internal resources, you need to define filter rules (see Configuring the filter and NAT policy). If other devices in your organization are located between the SNS firewall and accessible internal resources, you must set static routes on these devices for access to the network assigned to SSL VPN clients. |
|
Network assigned to clients (UDP)
Network assigned to clients (TCP) |
Select the object corresponding to the TCP and UDP networks assigned to SSL VPN clients. Select the network or sub-networks according to the following criteria:
|
| Maximum number of simultaneous tunnels allowed |
The number appears automatically. This number corresponds to the lowest value, either the number of tunnels allowed on the SNS firewall (see Requirements), or the number of sub-networks available for SSL VPN clients. For sub-networks:
|
DNS settings sent to client section
| Field | Description |
|---|---|
| Domain name | Enter the domain name assigned to the SSL VPN clients so that they can resolve their host names. |
|
Primary DNS server
Secondary DNS server |
Select the object representing the DNS server to be assigned. |
IMPORTANT
With Stormshield SSL VPN clients in macOS and Linux, scripts must be used to accommodate a specific DNS configuration when OpenVPN does not manage it natively. For further information on the use of these scripts, refer to the Stormshield SSL VPN client installation guide.
Advanced properties section
| Field | Description |
|---|---|
| Enable DCO kernel acceleration |
On SNS in version 5 in factory configuration, the DCO (Data Channel Offload) kernel acceleration feature is enabled by default. Select or unselect the checkbox to enable or disable this feature. On SNS in version 4, this feature is not available. This feature improves the performance of UDP-based SSL VPN tunnels. It is not compatible with TCP-based SSL VPN tunnels. The SSL VPN client used must be compatible with the DCO feature to benefit from enhancements. As for the Stormshield SSL VPN client:
NOTE
|
| Public IP address of the UTM for the SSL VPN (UDP) |
In the following cases, you need to select the object representing the IP address to reach in order to set up UDP SSL VPN tunnels:
|
| Port (UDP)
Port (TCP) |
The listening ports of the SSL VPN service can be changed. Note:
|
| Interval before key renegotiation (seconds) |
You can change the length of time after which the keys used by the encryption algorithms will be renegotiated. By default, it is set to 14400 seconds, or 4 hours. During this operation:
|
| Use DNS servers provided by the firewall |
You can instruct SSL VPN clients to include the DNS servers retrieved via the SSL VPN in the workstation's (Windows only) network configuration. If DNS servers are already defined on the workstation, they may be queried. |
| Prohibit use of third-party DNS servers |
You can instruct SSL VPN clients to exclude the DNS servers that have already been defined in the workstation's (Windows only) configuration. Only DNS servers sent by the SNS firewall can be queried. |
Scripts to run on the client (Windows only)
The Windows Stormshield SSL VPN client can automatically run scripts on the user's workstation every time an SSL VPN connection is opened or closed.
SNS firewall provides these .bat scripts to the Stormshield SSL VPN client. They have to be selected in the following fields:
| Field | Description |
|---|---|
| Script to run when connecting |
The .bat script to run when the SSL VPN tunnel is opened. Example of a script that makes it possible to connect the Z: network drive to the shared network: NET USE Z: \\myserver\myshare |
| Script to run when disconnecting |
The .bat script to run when the SSL VPN tunnel is closed. Example of a script that makes it possible to disconnect the Z: network drive from a shared network: NET USE Z: /delete |
In these .bat scripts, you can use:
-
Windows environment variables (%USERDOMAIN%, %SystemRoot%, etc.),
-
Variables relating to the Stormshield SSL VPN client: %NS_USERNAME% (user name used for authentication) and %NS_ADDRESS% (IP address assigned to the SSL VPN client).
Certificates
Select the certificates that the SNS firewall’s SSL VPN service and SSL VPN clients must present to set up SSL VPN tunnels. These certificates must be issued from the same certification authority.
By default, a server certificate and a client certificate, issued by the same certification authority dedicated to the SSL VPN, are suggested. These certificates and the certification authority were created when the SNS firewall was initialized.
| Field | Description |
|---|---|
| Server certificate |
Select the desired certificate. |
| Client certificate |
Select the desired certificate. Client certificates with a TPM-protected private key ( |
Configuration
| Field | Description |
|---|---|
| Export the configuration file |
Click on this button to export the SSL VPN configuration in OVPN format. You can then import this file into your organization's SSL VPN clients to add a new connection. As for the Stormshield SSL VPN client v5, this configuration is automatically retrieved for connections that are set up in Stormshield mode (or Automatic mode in v4). For OpenVPN connections (imported OVPN file), the file must be imported to set up or save the connection. For more information, refer to the Stormshield SSL VPN client v5 user and configuration guide. |