Plugging in and starting the firewall
Plugging in the firewall
-
Connect the firewall to its power supply. Refer to the section Installation precautions in the Product presentation and installation guide for instructions.
IMPORTANT
For installations in a cabinet, equipment has to be reliably earthed. Particular attention should be given to supply connections other than direct connections to the branch circuit (e.g. use of terminal blocks)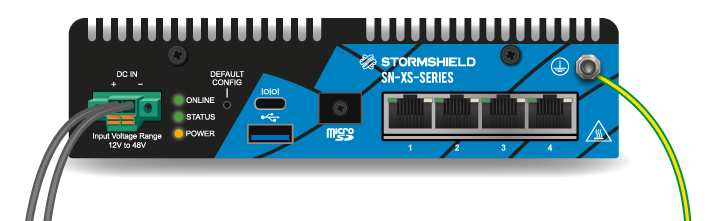
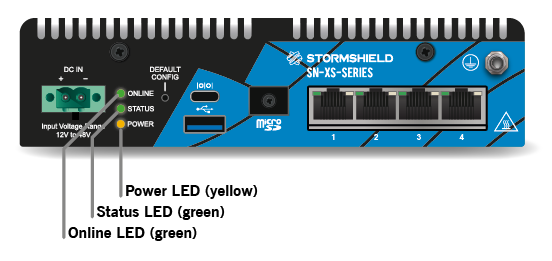
Once your firewall has been powered up, it will automatically start up. Wait for several minutes until the Status LED lights up.
-
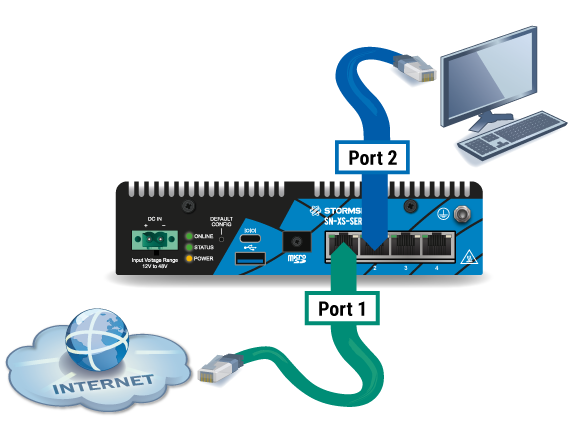
Connect the network ports as follows:
-
External interface on port 1 (OUT),
-
Internal interface (administration interface) on port 2 (IN).
-
Connecting to the firewall
-
Using your client workstation, log in to the administration interface at the following address: https://10.0.0.254/admin.
-
Enter admin as the login and password.
-
During the initial connection, a warning message may appear in your browser. Confirm that you wish to continue accessing the administration interface.
When you encounter hardware issues on your firewall, or if any of the components does not match its description, contact your certified partner.
Troubleshooting
I am unable to connect to my firewall
Check the configuration on your client workstation. DHCP has to be enabled on this client workstation, or its IP address has to belong to the same address range as the firewall’s (10.0.0.0/8).
I am unable to access the administration interface
If you have connected your client workstation over port 1, you will no longer be able to access the administration interface to resolve this issue:
-
Connect your client workstation on port 2.
- Log in to the firewall in console mode (refer to the Product presentation and installation guide).
- Restart the firewall.