SN1100 model
This product has a removable power supply.
A second power supply module can be ordered separately for redundant power supply.
Front panel: connectors and LEDs

|
|
1 OUT interface
2 IN interface |
The SN1100 model holds 8 1Gbe ports by default and 2 SFP+ sockets for adding 1Gbe/10Gbe transceivers. On this model, 2 extension modules can be added with RJ45 (1Gbps, 2.5Gbps or 10Gbps) or fiber (1Gbps, 10Gbps or 25Gbps) connectors.
Specifications of Stormshield Network-approved extension modules and transceivers are set out in sections Extension modules (SN710 and upwards) and Fiber Ethernet connectors.
|
|
 1 Online LED (green)2 Status LED (green) 1 Online LED (green)2 Status LED (green) 3 Power LED (yellow) 3 Power LED (yellow) |
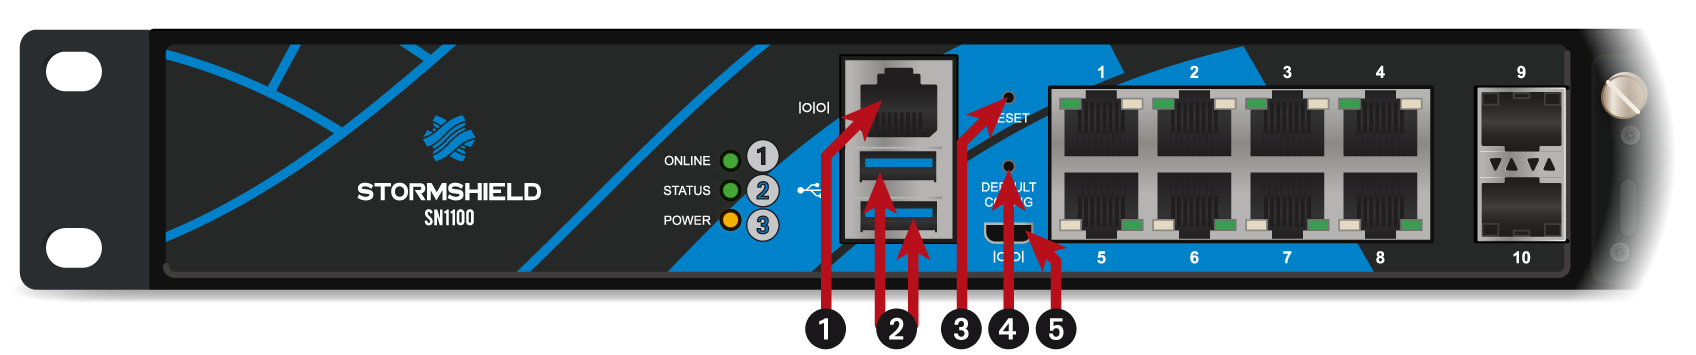
| 1 | The serial port enables access to the product in console mode; the user can connect to the firewall directly from a computer. The default baud rate on this model is 115200 baud (8N1). |
| 2 | Two USB 3.0 ports that can be used for secure configurations or upgrades. You may also plug in a USB key, USB keyboard or approved USB modem. |
| 3 | The Reset button: electrically resets the firewall. |
| 4 | This is the button for resetting the appliance to its factory settings (defaultconfig). |
| 5 | The micro USB port makes it possible to access the product in console mode*; the user can connect to the firewall directly from a computer. The default baud rate on this model is 115200 baud (8N1). |
* This connection in console mode requires the installation of a third party driver. Depending on your operating system, you can download a driver from: https://documentation.stormshield.eu/SNS/PL23XX-driver
Rear panel: connectors

| 1 | The HDMI port makes it possible to connect a monitor. |
| 2 |
The USB 3.0 port can be used for secure configurations or upgrades. You may also plug in a USB key, USB keyboard or approved USB modem. |
| 3 | The power button makes it possible to switch the firewall on or off. |
| 4 | The mains socket. Modules are hot-swappable on products with a redundant power supply. |
| 5 | The Alarm off button. The alarm rings when a power supply module is missing or when there is a power failure on either module. Press this button to deactivate the alarm. |
| 6 | Connection of the protective earth circuit. |