Deploying the SNS PAYG virtual firewall based on a template
Once you have created your SNS PAYG firewall template, you can deploy new machines based on it.
IMPORTANT
The virtual firewall must have Internet access so that it can enroll on the Stormshield Pay As You Go cloud service.
VMware environment
- In vSphere Client, right-click on your template and select New VM from this template.
- Name your SNS PAYG virtual firewall and select its location.
- Select the calculation resources and storage. Do not select any cloning options.
-
Edit the parameters according to your needs: host name, customer ID, network parameters. Enter a Customer ID of your choice if you wish to associate this firewall with a particular client. This information will be provided together with the serial number in activity reports that will be sent along with the monthly invoice.
- Click on Finish to confirm your settings.
-
Start up your virtual firewall.
-
Once the network connection has been established: the firewall will contact the cloud service to obtain an identity, a certificate and a license. This step will take several minutes. A message on the console will inform you when the firewall has been enrolled and that it will restart,
-
If an enrollment error occurs: check the Internet connection and restart the virtual firewall to start the enrollment process again.
-
-
As soon as the firewall is enrolled and restarted, it will have a new serial number, e.g., VMSNSX08J0162B9-76DAA1B6.
Other virtualization environments
- Create a new SNS PAYG virtual firewall from a template (for XenServer and KVM) or a clone (for Hyper-V), and start it.
-
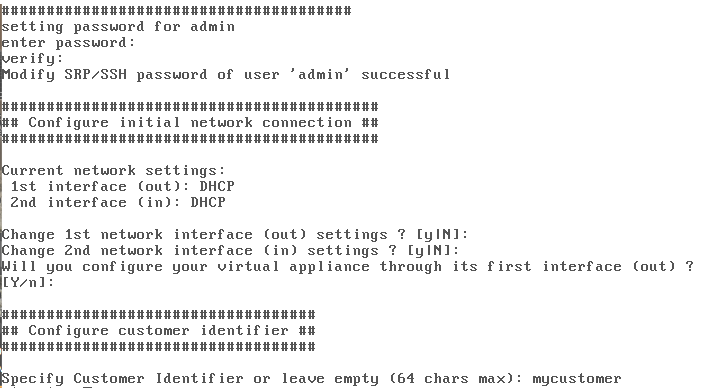
Open the console. A wizard will guide you through the configuration of your initial installation. You will be able to choose a password for the admin superuser, configure the network parameters for each interface detected, and specify a Customer ID.
-
Once the network connection has been established: the firewall will contact the cloud service to obtain an identity, a certificate and a license. This step will take several minutes. A message on the console will inform you when the firewall has been enrolled and that it will restart,
-
If an enrollment error occurs: check the Internet connection and restart the virtual firewall to start the enrollment process again.
-
-
As soon as the firewall is enrolled and restarted, it will have a new serial number, e.g., VMSNSX08J0162B9-76DAA1B6.