Creating IPsec VPN peer profiles
In the module Configuration > VPN > IPsec VPN, Peers tab.
- Click on Add.
- Select New mobile peer.
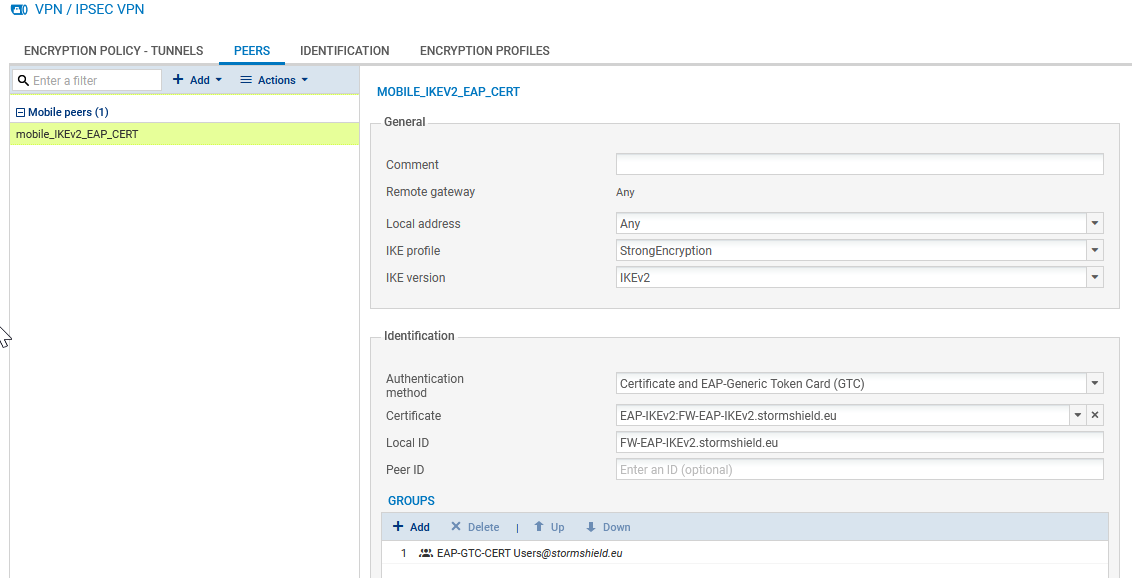
- Name the mobile configuration (mobile_IKEv2_EAP_CERT in the example), select IKEv2 in the IKE version field, then click on Next.
- Select EAP-Generic Token Card (GTC) as the Authentication type, then click on Next.
- In the Certificate field, select the certificate that the firewall has to present to set up tunnels with these mobile peers (FW-EAP-IKEv2.stormshield.eu in this example).
- In the Groups table, click on Add and select the mobile user group(s) that use(s) this peer profile (EAP-GTC-CERT Users group in the example).
- Click on Next.
- Confirm by clicking on Finish.
- Select the peer created earlier and fill in the Local ID field.
In general, the DNS name (FQDN) of the firewall is used in the peer’s certificate. In this example: FW-EAP-IKEv2.stormshield.eu. - Click on Apply then on Save.
- Click on Yes, activate the policy.
The profile configured for IPsec mobile peers is therefore:
Adding the CA that signed the firewall's certificate in trusted authorities
NOTE
If the CA was issued from an external PKI, its certificate will need to be imported in advance in the firewall’s Certificates and PKIs module.
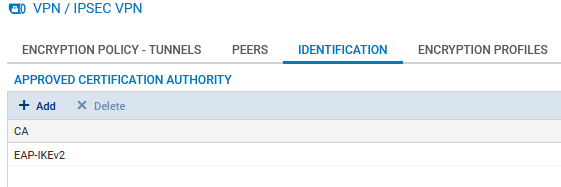
In Configuration > VPN > IPsec VPN, Identification tab:
- In the Accepted certification authorities table, click on Add.
- Select the CA that signed the firewall's certificate (EAP-IKEv2 in this example).
- Click on Apply, then on Save to save the changes.
