Making the initial connection on the firewall
Now that your firewall is installed and running, you can connect to it.
Accessing the firewall administration interface
- Using a web browser on the client workstation, go to https://10.0.0.254/admin. Refer to the Product Life Cycle guide to see the list of supported web browsers.
- A warning message appears, indicating that the visited domain is invalid. This is normal because the certificate that the firewall uses is self-signed. Continue to the site.
- The page allowing the connection to the firewall’s administration interface appears. Enter "admin" as the login and password, then log in.
By default, If you enter the wrong login or password four consecutive times, you will need to wait for a minute before you can authenticate again. If you attempt to authenticate again before the minute is up, the waiting time will be extended by another minute, up to a maximum of 10 minutes. The number of tries and waiting time can be configured. For more information, refer to the Firewall administration tab section in the v4 or v3 user manual in the SNS version used.
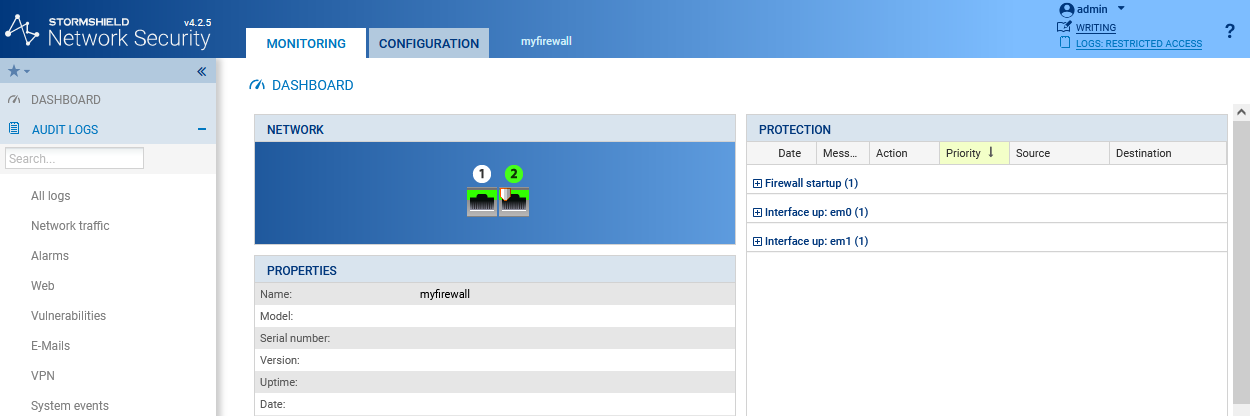
The administration interface appears. Its layout varies according to the pre-installed version of SNS.
Administration interface of an SNS firewall in version 4
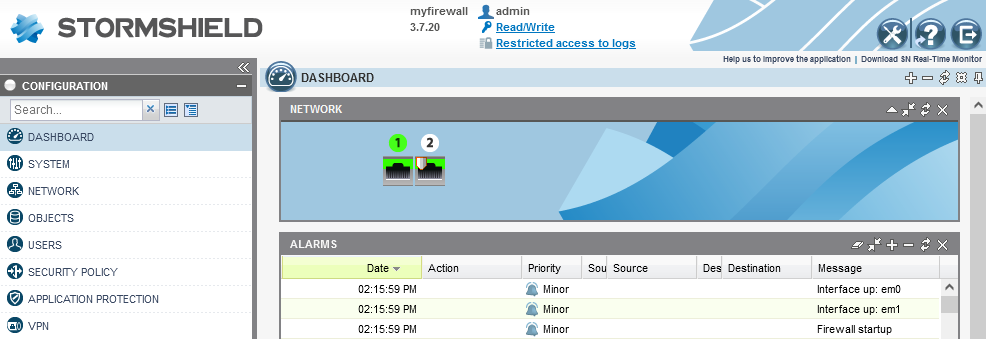
Administration interface of an SNS firewall in version 3
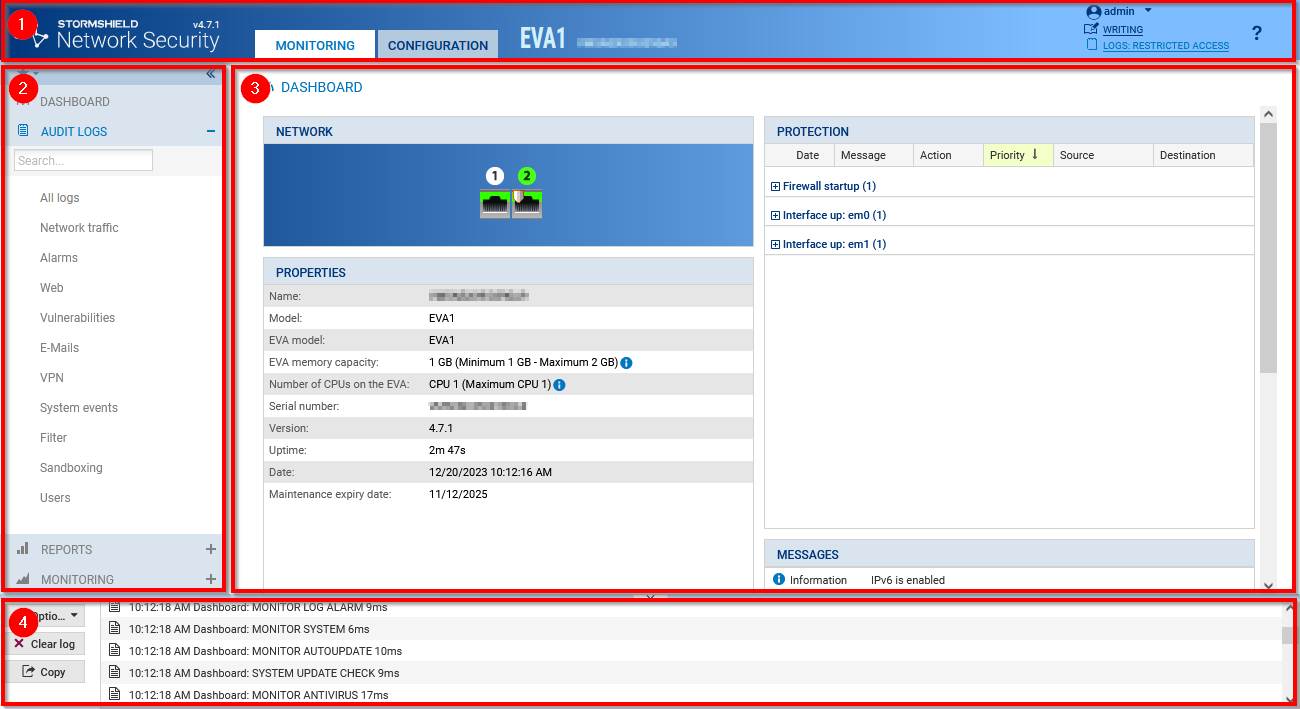
Understanding the graphical user interface
The window consists of 4 zones:
-
The upper banner, which presents the Monitoring and Configuration views and provides information on the status of the firewall;
-
The menu on the left, which provides access to the various modules on the firewall;
-
The active window of the selected module;
-
The lower window, which shows errors, warnings, commands and notifications.
The administration interface does not have the Monitoring and Configuration tabs in version 3, as all modules are grouped in the menu on the left.
Upper banner

In the upper banner, the following items are displayed from left to right (the order may vary or certain items may not be available in version 3):
-
The version number of your firewall,
-
Two tabs that show two firewall views: Monitoring and Configuration,
-
The model number of your firewall and its name: scroll over the name to see the serial number,
-
A flickering icon that shows whether the status of your firewall requires your attention: scroll over the icon to show monitored items and their status,
-
Your user name: click on it to go to your preferences or to log in,
-
Your read and write permissions: scroll over the permissions to see more information,
-
Your permissions to access logs: if you are in restricted access mode, click on the item to request full access,
-
The
 icon, which opens the page in the online SNS user manual relating to the module you are viewing.
Left menu
The menu on the left provides access to various modules corresponding to available features. Modules are grouped by category. You can:
-
Collapse the menu by clicking on
 ,
,
-
Expand and collapse categories by clicking on them,
-
Set modules as favorites by clicking on the
 icon that appears by scrolling over the name of a module,
 -
Quickly access favorite modules by clicking on the
 icon at the top of the menu.
If modules are grayed out in the menu, this may mean that:
-
You have not subscribed to the required license and therefore cannot access them.
-
The user account that you used for logging in does not have the necessary permissions to access these modules.
The modules in the menu vary depending on whether you are in Monitoring or Configuration view.
When you perform searches through the search bar, both the name of the module and its content will be part of the search.
Active window
The content of this window varies according to the module displayed.
Lower window
The lower window shows errors, warnings, commands and notifications. You can:
-
Show or hide this window by clicking on the arrow in the middle
 .
. -
Configure the messages that appear by clicking on Options.
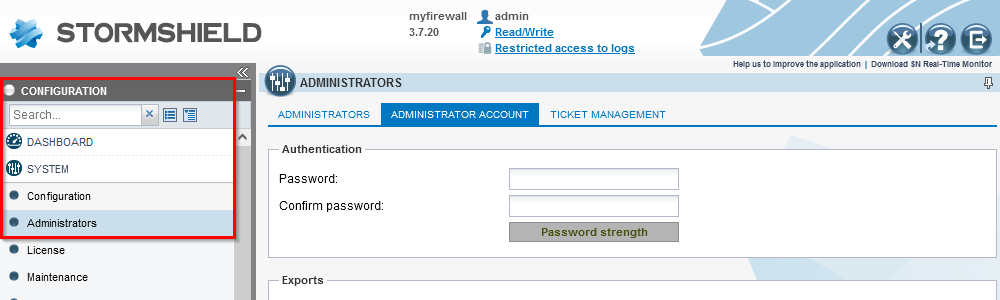
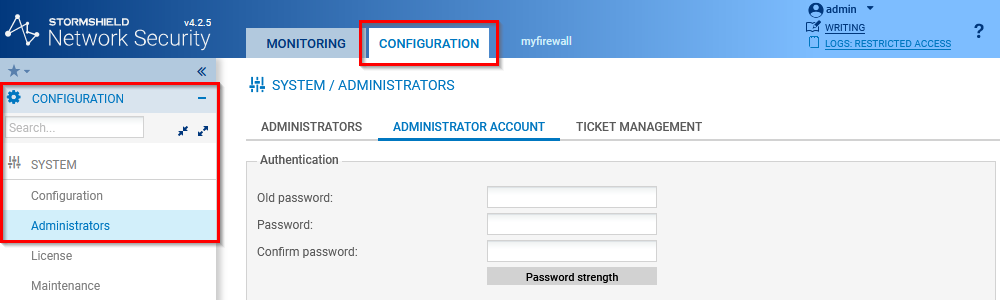
Changing the "admin" account password
For security reasons, you must change the default password of the “admin” user during the initial connection to the firewall.
- If the firewall is in version 4, go to the Configuration tab located in the upper banner. Changes to the configuration can be made in this tab.
- From the menu on the left, go to Configuration > System > Administrators,Administrator account tab.
- If the firewall is in version 4, enter admin in the Old password field.
- Enter the new password and confirm it. Take note of the following points:
- A progress bar will show the strength of the password that you typed. Use a combination of uppercase and lowercase characters to increase its level of security.
- The password cannot contain:
" <tab> <space>
- Click on Apply , then Save.
The new password must be used at the next connection.
Administration interface of an SNS firewall in version 4
Administration interface of an SNS firewall in version 3