Creating the profile of IPsec VPN peers
In the module Configuration > VPN > IPsec VPN > Peers tab.
- Click on Add.
- Select New remote peer.
- Name the mobile configuration (IKEv2_Mobile_Users in the example), select IKEv2 in the field IKE version, then click on Next.
- For Authentication type, select Pre-shared key (PSK), then click on Next.
- In the Mobile tunnels: pre-shared keys (PSK) table, click on Add.
- In the User ID field, enter the e-mail address of the peer.
- In the Pre-shared key (ASCII) and Confirm fields, enter the password used to set up the IPsec VPN tunnel for this peer.
For obvious security reasons, choose unique passwords that meet ANSSI recommendations (in French). - Click on Apply.
- Repeat steps 5 to 8 for each authorized mobile user.
- Click on Next.
You will see a summary showing the name of the peer, the policy and type of authentication chosen. - Confirm by clicking on Finish.
- Select the peer created earlier and fill in the Local ID field.
In general, the DNS name (FQDN) of the firewall is used. Example: vpn-gw.stormshield.eu. - Click on Apply, then on Save.
- Click on Activate this policy.
The profile configured for IPsec mobile peers is therefore: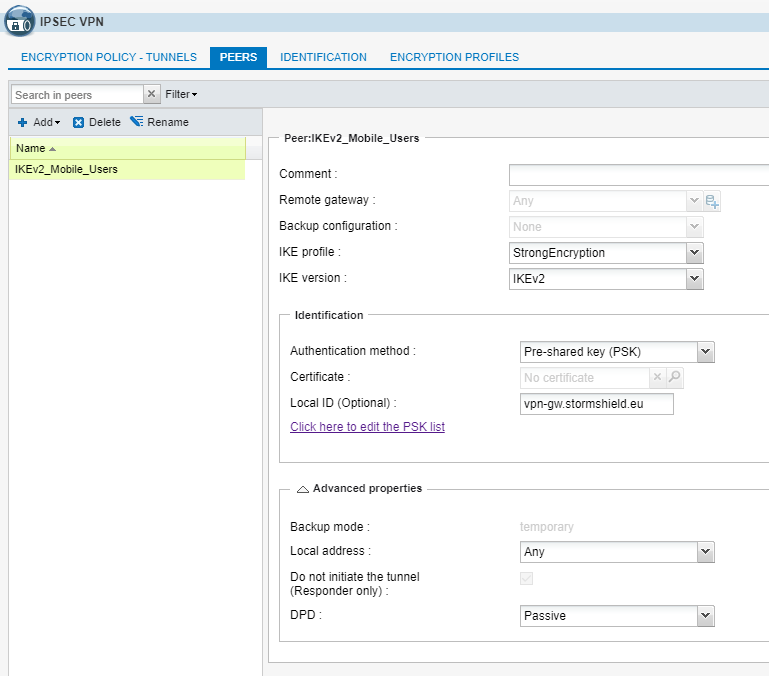
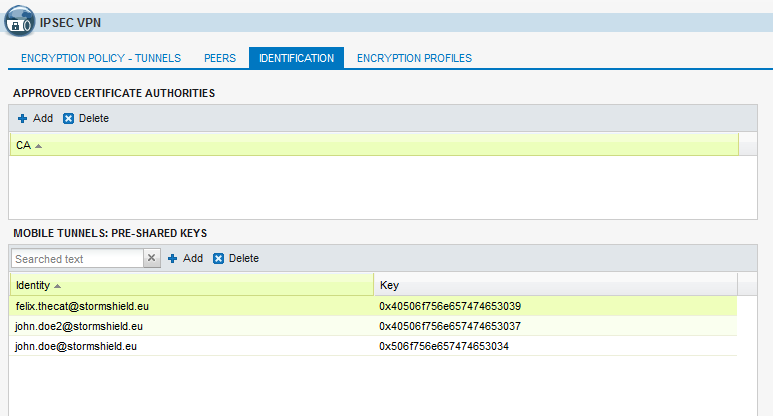
Adding pre-shared keys (PSK) to an existing policy
In the module Configuration > VPN > IPsec VPN > Identification tab:
- Click on Add in the Mobile tunnels: pre-shared keys table.
- In the User ID field, enter the e-mail address of the peer.
- In the Pre-shared key (ASCII) and Confirm fields, enter the password used to set up the IPsec VPN tunnel for this peer.
For obvious security reasons, choose unique passwords that meet ANSSI recommendations (in French). - Click on OK.
- Repeat steps 1 to 4 for each PSK to be added.
Example of a table of pre-shared keys: