Creating IPsec tunnels
Adding the CA to the list of trusted CAs
In the menu Configuration > VPN > IPsec VPN > Identification tab:
- Under Approved certificate authorities, click on Add.
- Select your CA.
- Save.
Creating IPsec peers
In the menu Configuration > VPN > IPsec VPN, select the Peers tab.
- Click on Add.
- Click on New IKEv1 remote site or New IKEv2 remote site depending on the IKE protocol version you use.
- The wizard will then ask you to select the remote gateway. In this case, this gateway will be the public address of the first remote Firewall (object Pub_FW_Site_A).
By default, the name of the peer will be created by adding a prefix “Site_” to this object name; this name can be customized.
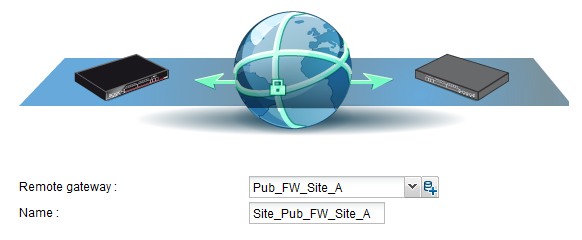
- Press Enter.
- Check the Certificate checkbox.
- Click on the magnifying glass next to the Certificate field.
- Select the one corresponding to the main Firewall.
The Trusted CA field is automatically entered by the certificate. - The wizard will display a summary of the peer you have just created.
- Click on Finish to close this window.
- Click again on Finish to close the wizard.
- Repeat all the steps to create the IPsec peer for remote site B.
Selecting the encryption policy and adding the VPN tunnel
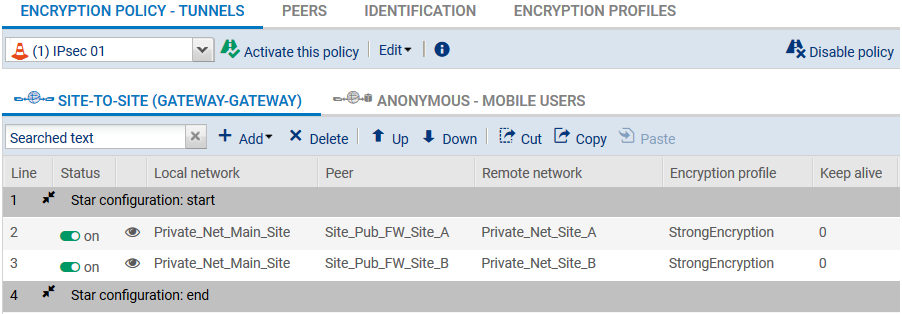
In the menu Configuration > VPN > IPsec VPN > Encryption policy – Tunnels tab.
- Select the encryption policy you wish to configure.
- You can rename it later by clicking on Edit.
- Next, click on Add to define the IPsec tunnels.
- Select the Star configuration model.
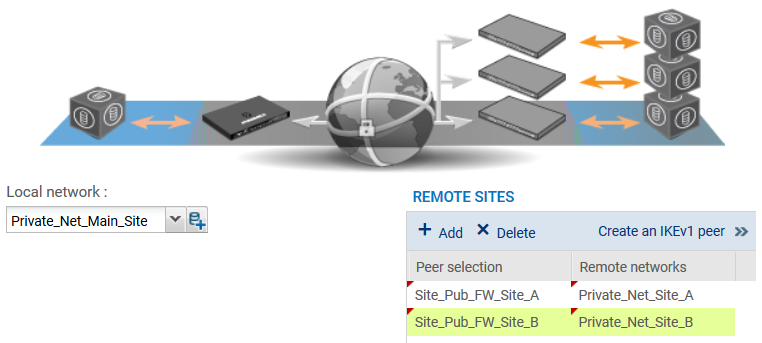
A wizard will automatically launch. - In the Local network field, select your object Private_Net_Main_Site.
- In the Remote sites table, click on Add to select the first peer by associating its network (Site_Pub_FW_Site_A and Private_Net_Site_A). Peers can be created directly in this wizard by clicking on >> then Create a peer.
- Repeat the operation for the second peer (Site_Pub_FW_Site_B and Private_Net_Site_B).
IMPORTANT
Ensure that you do not select the Treat IPsec interfaces as internal interfaces checkbox (applies to all tunnels). This option would prevent the setup of tunnels between remote sites and the main site (it can only be used in a Hub & Spoke configuration). If you have selected it by mistake, go to the Advanced properties window in the Inspection profiles module (Application protection menu) and unselect Treat IPsec interfaces as internal interfaces (applies to all tunnels - remote networks will need to be explicitly legitimized).
- Validate by clicking on Finish.
The IPsec tunnels are now defined on the main site and the tunnels will be automatically enabled (Status “on”). - You can now click on Enable this policy.