Creating the PKI infrastructure
Certification authority (CA)
In the menu Configuration > Objects > Certificates and PKI:
- Click on Add > Root Authority.
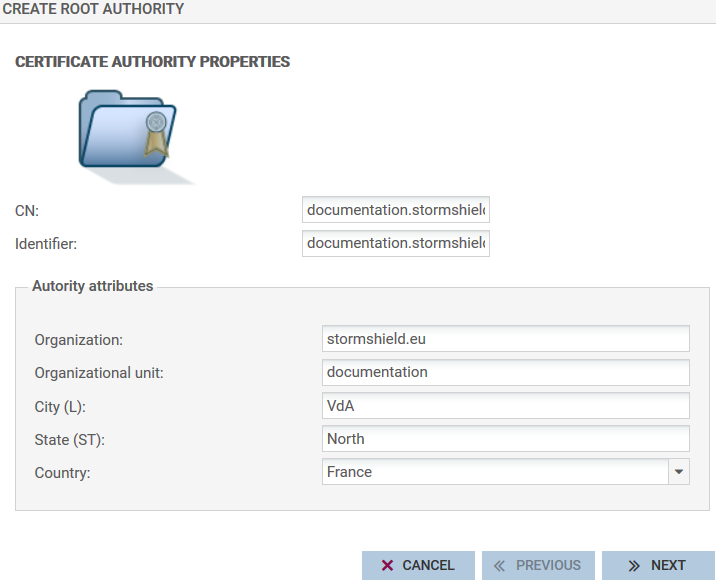
- Fill in the various required fields in the wizard:
- CN: the name of your certification authority,
- ID: the name entered in the CN field is suggested by default,
- Organization (O). Example: the name of your company,
- Organizational unit (OU). Example: the name of the CA user’s department,
- State or province (ST),
- Country (C).
- Fill in the following fields:
- Password (necessary when creating certificates),
- E-mail address (optional),
- Key size (2048 bytes by default),
- Validity (365 days by default).
- You can define the URIs of CRL (Certificate revocation lists) distribution points.
Certificate revocation lists (CRL)
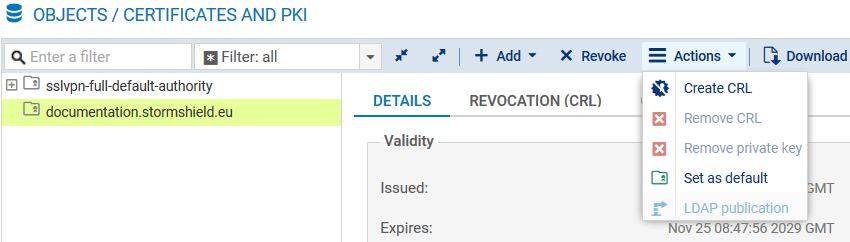
- In the menu Configuration > Objects > Certificates and PKI:
- Select your CA and click on Actions > Create a CRL.
- The wizard will ask you for the password to the certification authority. Enter it and click on Create a CRL to confirm.
- Next, download the CRL (file in PEM format) in order to import it later on remote Firewalls.
Certificate of the main Firewall
In the menu Configuration > Objects > Certificates and PKI:
- Click on Add > Server identity.
- Fill in the field Fully qualified domain name with the FQDN of the main Firewall.
The ID field suggests the same name by default. - Indicate the duration of the Validity and the Key size.
- Click on the magnifying glass next to the Certification authority field and select your CA to sign this certificate.
- Enter the password of the certification authority.
The attributes of the certificate are imported automatically; you can however modify them. - The wizard will display a summary of the certificate. Click on Finish to close it.
Certificates of remote Firewalls
Create server certificates for the remote Firewalls by following the method described earlier.
Exporting security data of remote sites
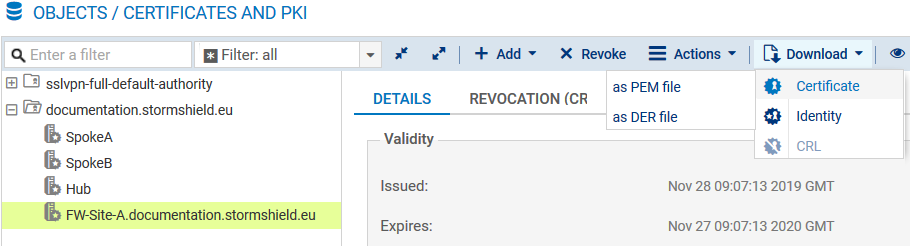
In the menu Configuration > Objects > Certificates and PKI:
- Select the certificate of one of the remote Firewalls.
- Click on Download > Certificate and choose the desired file.
- After entering a password to protect it, download the certificate by clicking on the hyperlink.
- Save it on your administration workstation.
- Follow the same steps to export the certificate of the second remote Firewall.