Updating BIOS (SNi20)
Most of the connectors on these firewall models are located on the front panel, except for the HDMI micro port on the underside of the appliance.
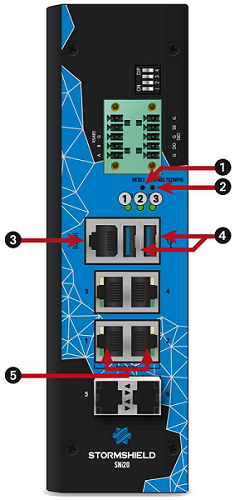 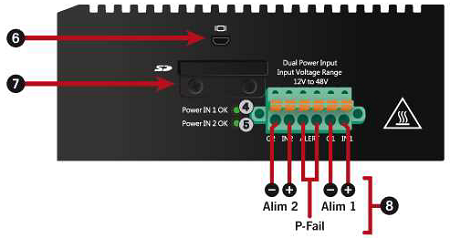 |
1: Reset button 2: Button to reset the appliance to its factory settings (defaultconfig). 3: Serial port in console mode 4: USB 3.0 port 5: Ethernet network ports dedicated to bypass connections 6: Micro HDMI port: for plugging in the monitor 7: Location of the SD card 8: Six-pole screw terminal connector (for a 48 V DC redundant electrical power supply). |
Connecting devices to the firewall
- Plug the monitor into the micro HDMI port (6) on the firewall.
- Plug the keyboard into a USB port (4) on the firewall.
- Insert the USB drive into the second USB port (4).
Checking the BIOS version on the firewall
- Connect to the firewall in console or SSH using a Putty program.
- Authenticate using the admin account.
- Enter the command: dmidecode -s bios-version
The firewall will show the BIOS version, which must be R1.03.
Updating BIOS on the firewall
IMPORTANT
The update process is fully automatic and lasts around five minutes.
Once the process is run, it must never be interrupted and the firewall must not be disconnected from the power supply. If this occurs, your firewall will be completely unable to run.
If your firewall has redundant power supply modules, ensure that you have plugged both modules into the electrical grid.
- Restart the firewall by using the reboot command.
The firewall will start up automatically on the USB drive. - In the command prompt, run the executable file FlashR106.nsh:
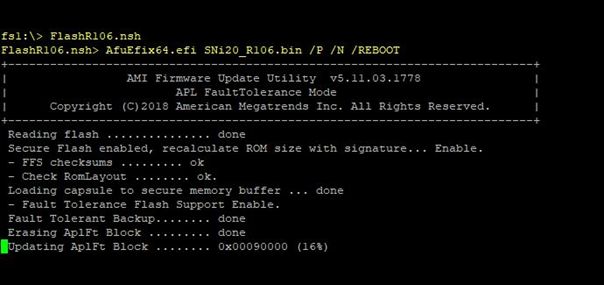
When the update process ends, the firewall will automatically restart and show the following information: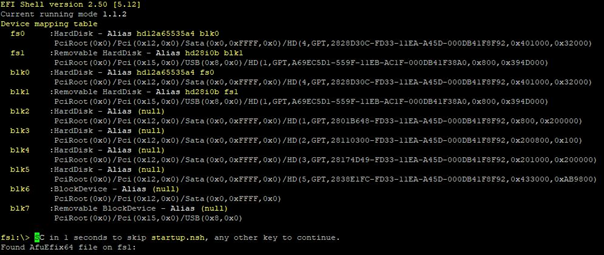
- Disconnect your firewall from the electrical grid (or both power supplies if your firewall has redundant power supply modules).
- Unplug the USB drive from your firewall.
Checking the BIOS version on the firewall after an update
- Plug the power cord(s) into the SNi20 firewall.
Your firewall will automatically restart. - When the system has fully restarted after the BIOS update (all 3 LEDs, Online, Status and Power are on), repeat the procedure of Checking the BIOS version on the firewall.
This time, the version indicated should be R1.06.