Example of server configuration - Windows 2008 Server and IIS
This example sets out the various steps in configuring an IIS server on Windows 2008 Server, allowing identification in Digest mode through an SSL connection (server certificate generated through the firewall’s PKI).
Please note that in order to enable SSL in IIS, the server has to be a member of an Active Directory domain.
Using the Windows file explorer, create the folder meant for receiving automatic backups (example: c:\inetpub\wwwroot\autobackup).
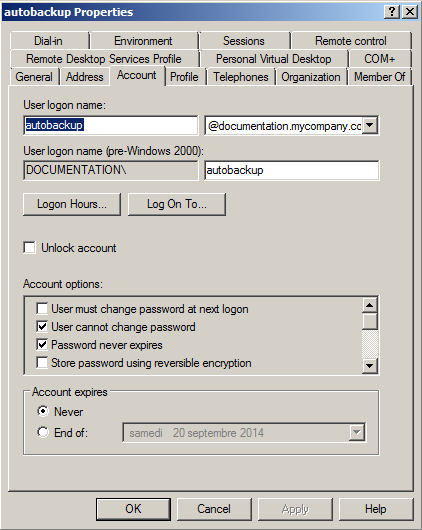
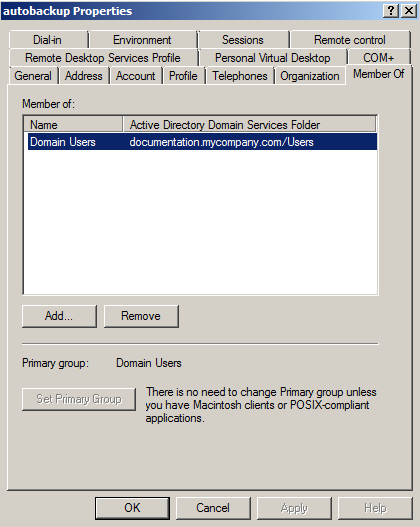
Create a dedicated user for automatic backups in the Active Directory Users and Computers console.
In this example, the account used is named autobackup and belongs to the Autobackup Allowed Users group specifically created for this purpose. Writing privileges on the folder dedicated to backups can be defined in the settings of the WebDAV site.
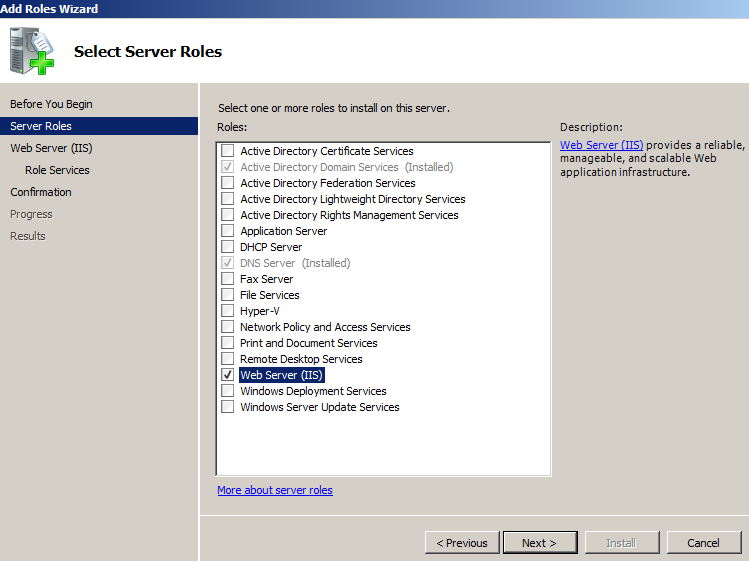
- If it has not yet been installed, add the IIS role in the Server Manager console (menu Add roles > Server roles > Web Server (IIS)).
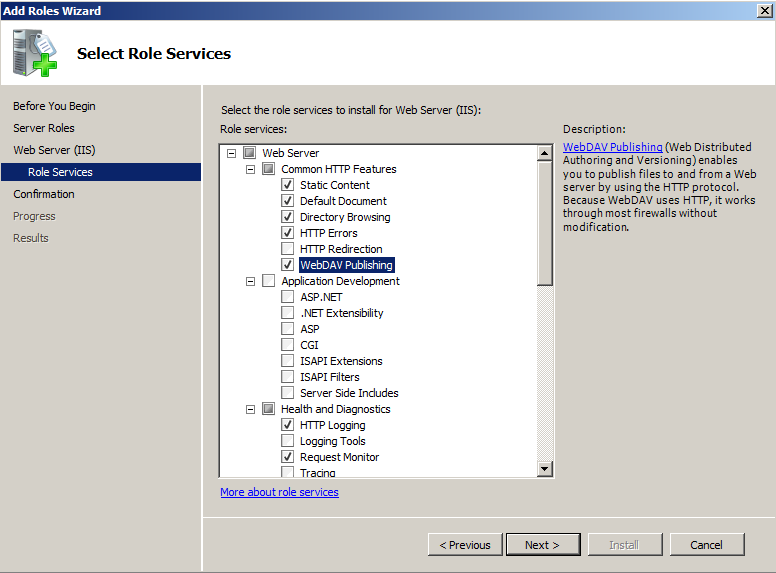
- During the installation of the IIS role, or when selecting the option Add Role service for the Web Server (IIS) role in the Server Manager console, select the following options:
Web Server
|----- Common HTTP Features
| |----- WebDAV Publishing
|----- Security
| |----- Basic Authentication
| |----- Digest Authentication
|----- Management Tools
| |----- Management Service
In this example, the site used for receiving and storing backups will not be the Default Web Site, but a dedicated site named autobackup, whose base folder will be located under the root of the Default Web Site (c:\inetpub\wwwroot).
- Launch the Internet Information Server (IIS) Manager console.
- Right-click on Default Web Site.
- Select the option Add Virtual Directory.
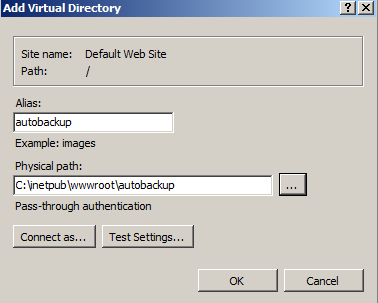
- In the field Alias, select the name given to your site (example: autobackup); the address of the site will take the form https://server_name.company.com/alias.
- In the field Physical path, select (or create) the physical folder corresponding to your virtual site (example: c:\inetpub\wwwroot\autobackup).
- Right-click on your site.
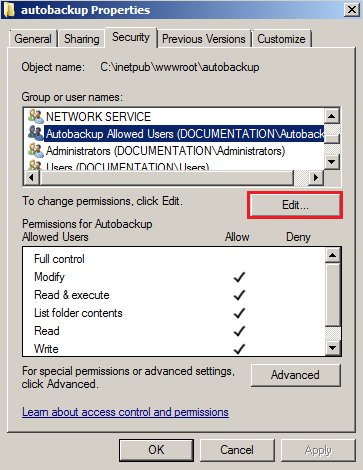
- Select the option Edit Permissions to grant writing privileges to the group of dedicated users on the physical folder meant for storing the backups.
- In the Security tab, click on Edit.
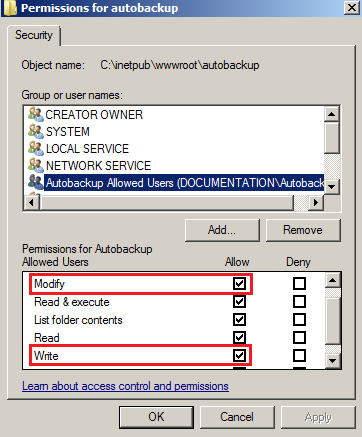
- Select the user group (example: Autobackup Allowed Users).
- Select the checkboxes Modify and Write.
- Validate.
- In the Internet Information Server (IIS) Manager console, select your site (autobackup in the example).
- Double-click on the Directory browsing icon.
- In the right panel (Actions), click on Enable.
Backup files are encrypted and have an “.enc” extension. Since this extension is unknown to the IIS server, it must be defined so that the server will know which action to perform when you click on the link corresponding to a backup (execute the file, suggest opening or downloading it, etc.).
- In the Internet Information Server (IIS) Manager console, select your site (autobackup in the example)
- Double-click on the MIME Types icon.
- In the right panel (Actions), click on Add.
- In the field File name extension, indicate .enc.
- In the field MIME Type, specify application/octet-stream.
- In the Internet Information Server (IIS) Manager console, select Default Web Site.
- Double-click on the WebDAV Authoring Rules icon:
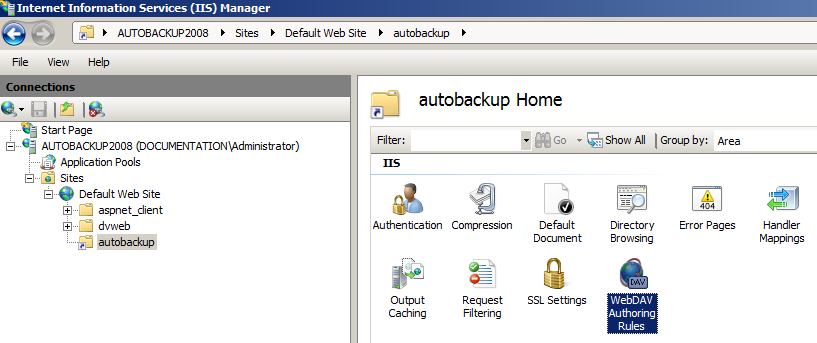
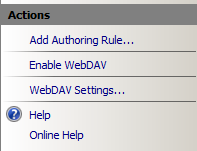
- In the right panel (Actions), click on Enable WebDAV:
- In the IIS console, select your site (autobackup in the example).
- Double-click on the WebDAV Authoring Rules icon.
- In the right panel (Actions), click on Add Authoring Rule.
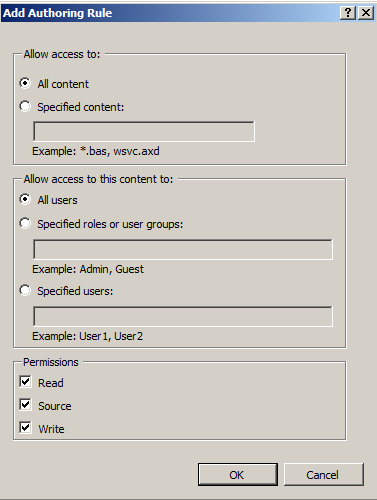
- For this rule, select the options All content, All users and permissions: Read, Source, and Write.
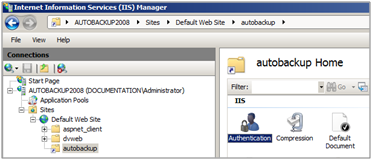
- In the Internet Information Services Manager console, click on your site.
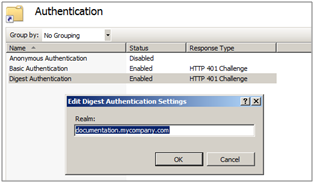
- Double-click on the Authentication icon.
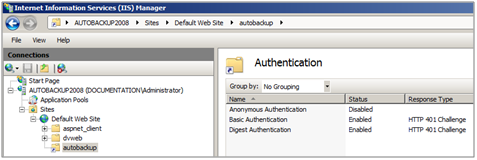
- Enable Basic Authentication and Digest Authentication.
- Disable Anonymous Authentication.
- Select Digest Authentication.
- Click on Edit in the right panel to specify the server’s Active Directory domain (documentation.mycompany.com in the example).
- Validate.
On the firewall hosting the CA used for automatic backups:
- Go to the Configuration > Objects > Certificates and PKI module.
- Create a server certificate relating to the server hosting the backups (menu Add > Add a server certificate).
- Select this certificate and export it in PKCS12 format (menu Download > Certificate as a P12 file).
- In the Internet Information Services Manager console, select the name of the server.
- Double click on the option Server Certificates.
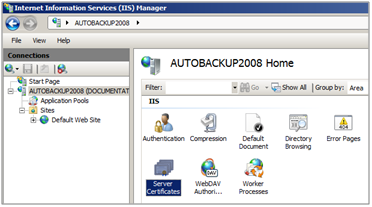
- In the right panel (Actions), click on Import.
- Select the server certificate.
- Enter the associated password.
The certificate will then appear in the IIS certificate store:

- In the Internet Information Services Manager console, click on the Default Web Site.
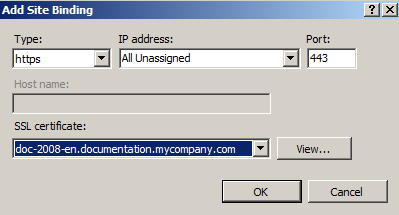
- Select the option Bindings in the right panel.
- Add a binding with the following values:
- Type: https,
- IP address: the IP address on which the server has to be contacted in HTTPS,
- Port: 443,
- SSL certificate: the imported server certificate.
- In the Internet Information Services Manager console, click on your site.
- Double-click on the icon SSL Settings.
- Select the checkbox Require SSL.
- Apply.