Using the SMC Active Update server
Once you have downloaded the databases on the SMC server, you must configure the SNS firewalls so that they use it as their Active Update server. This can be configured manually if you have few firewalls, or automatically using a script.
The server.crt and server.key files in the folder /etc/certs/activeupdate are used for TLS negotiations. They are generated the first time SMC is run, and the certificate is self-signed. If you prefer to replace them with your own files, restart the SMC server after you select them.
- In the web interface of the SMC server, select Configuration > Active Update server.
- In the Contact URL column, click on the URL to copy it.
- On each SNS firewall, declare the SMC server as the Active Update server by indicating the URL copied earlier. For more information about Active Update, refer to the SNS User guide.
- Create the static object that was used in the URL copied in step 2, and assign to it the IP address used to contact the SMC server.
-
First, import the SMC Active Update certificate on each SNS firewall:
- In the web interface of the SMC server, select Configuration > Active Update server.
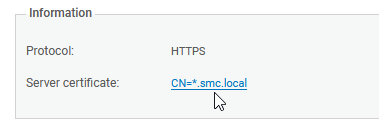
- Under Information, click on Server certificate to download the certificate.

- Create the Active Update configuration script with the commands described in the following example by replacing server.crt if necessary with the file name of your certificate:
PKI IMPORT format=pem type=ca $FROM_DATA_FILE("server.crt")
- Follow the usual steps for running a script, as shown in the section Running the SNS CLI script from the web interface by selecting the file of the certificate in the Attachments related to the script menu.
- Create objects on the SNS firewalls that would make it possible to verify the SMC certificate:
- Create the object creation script with the commands described in the following example.
CONFIG OBJECT HOST NEW name=activeupdate0.smc.local ip=<[private or public SMC server IP address]> resolve=static update=1
CONFIG OBJECT HOST NEW name=activeupdate1.smc.local ip=<[private or public SMC server IP address]> resolve=static update=1
CONFIG OBJECT ACTIVATEThe value of the name setting consists of an object name of your choice followed by the domain name. The private IP address is the one that can be seen in the IP address column in the Configuration > Active Update server panel in SMC.
- Follow the usual steps for running a script, as shown in the section Running the SNS CLI script from the web interface.
- Create the object creation script with the commands described in the following example.
- Create the Active Update configuration script with the commands described in the following example.
CONFIG AUTOUPDATE SERVER
url=https://activeupdate0.smc.local:8081/activeupdate
CA="CN=*.smc.local" state=on
CONFIG AUTOUPDATE ACTIVATEYou will find the value of the url and CA settings in the Contact URL and Server certificate fields in Configuration > Active Update server.
You can add custom settings to the script. For further information, refer to the CLI Serverd Commands Reference Guide.
TIP
To specify several URLs and CAs, separate them with commas:
url=https://activeupdate0.smc.local:8081/activeupdate,https://activeupdate1.smc.local:8081/activeupdate/activeupdate CA="CN=*.smc.local,CN=*.smc.local" state=on - Follow the usual steps for running a script, as shown in the section Running the SNS CLI script from the web interface.